
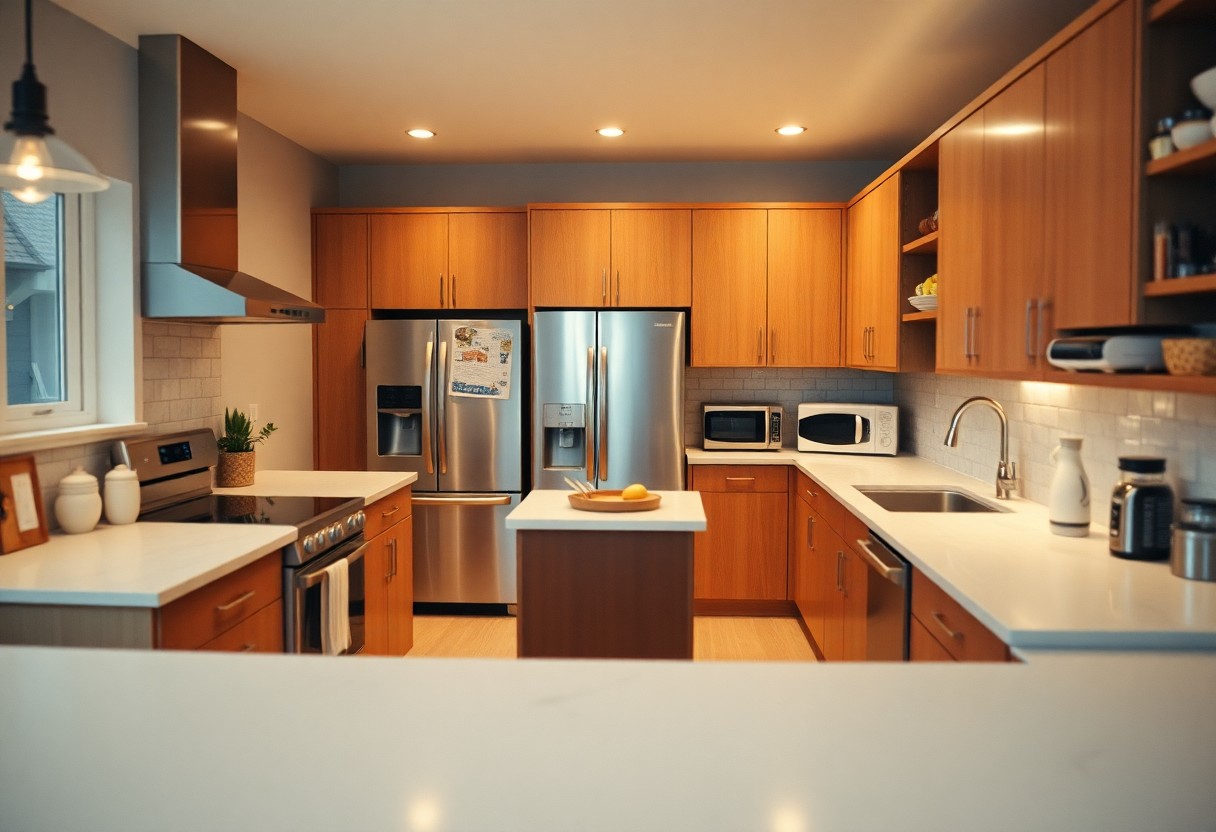
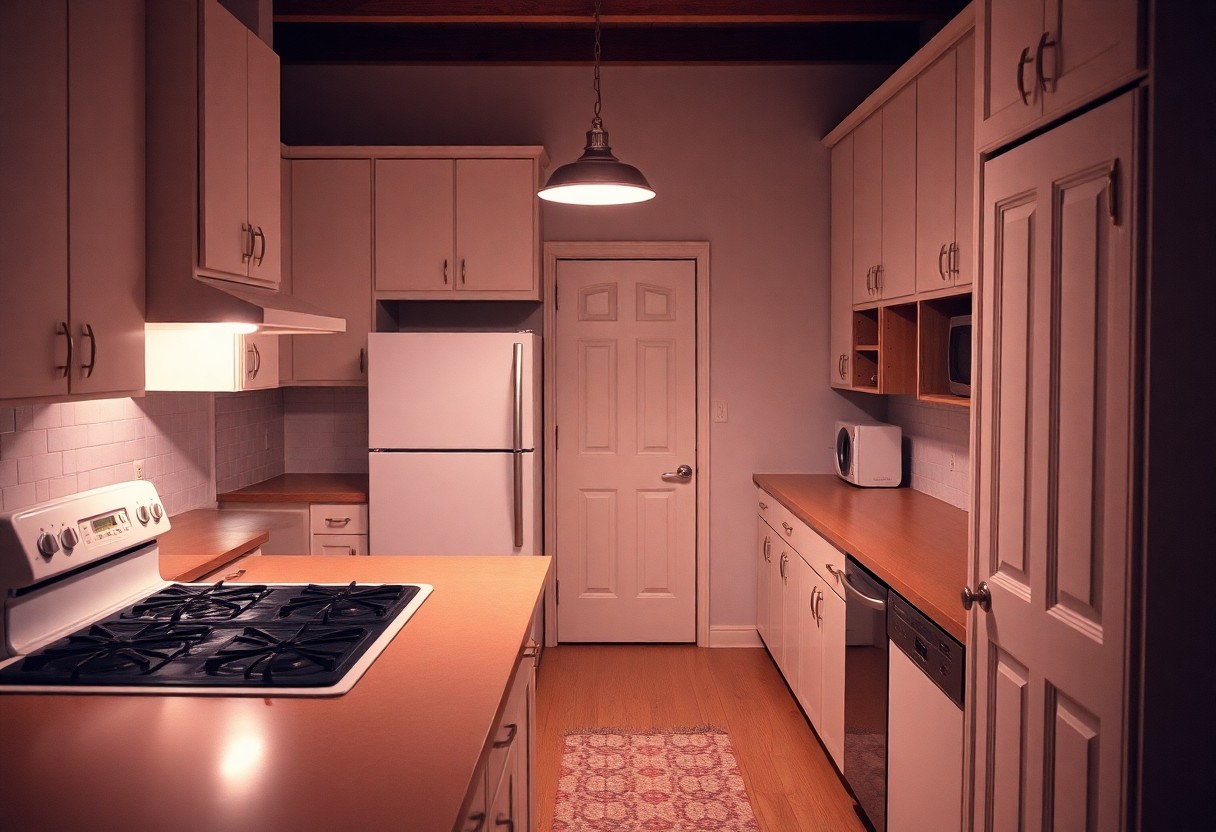
Kitchen layout mistakes often reduce efficiency and create hazards; you must avoid placing sinks, fridges and cookers so far apart that the work triangle is broken, squeeze traffic through cooking zones that become safety hazards, or skimp on storage and clear walkways that support your efficient, safe workspace.
With your kitchen layout, small errors can cause major issues: placing the sink far from the hob and fridge disrupts the workflow, while inadequate worktop space creates hazards; avoid cramped walkways and poor lighting that can be dangerous, and ensure appliance locations support your routine; prioritise storage near prep zones and a clear work triangle so you save time and reduce accidents, and choose durable surfaces to keep the space both efficient and attractive.
Common Kitchen Layout Mistakes
Ignoring the Work Triangle
When you scatter the cooker, sink and fridge, you break the classic work triangle that keeps tasks efficient; each leg is best kept between 1.2-2.7 metres with a total triangle length of roughly 4-9 metres. Placing the fridge around a corner or the hob opposite a blocked island forces extra steps, increases fatigue and raises the risk of spills or scalds when carrying hot pans across long distances.
Poor Flow and Accessibility
Poor circulation makes a kitchen feel cramped and unsafe: you should aim for aisle widths of about 1.2 m for two cooks and a minimum of 0.9 m for a single cook, while island clearances of 1.0-1.2 m maintain movement. Standard worktop height sits near 90 cm, but lowering to around 78-82 cm improves seated access and usability for shorter users or those with mobility aids.
Think through door swings, drawer clearances and appliance siting: place the dishwasher beside the sink to reduce drips, keep the oven door away from main thoroughfares and allow at least 1 m clear in front of hobs and ovens for safe manoeuvring. You’ll also benefit from drawers and pull-out shelving for heavy items and storing everyday crucials between hip and eye level to cut bending and reaching.
Common Kitchen Layout Mistakes
You often cram appliances and work zones together, leaving less than the recommended 1,000-1,200mm clearance around islands and aisles. That turns counters into bottlenecks, forces you to prep in tiny 600mm patches and pushes heat-generating appliances beside sinks or cabinets prone to water damage. For example, a fridge opposite a hob creates constant crossing paths during meal service, increasing spills and time spent fetching ingredients.
Ignoring the Work Triangle
You weaken workflow when the sink, hob and fridge are scattered, since each leg should ideally measure between 1.2 and 2.7 metres. If your fridge sits 4 metres from the main prep area you may add an extra 10-20 steps per meal, slowing cooking and increasing the chance of slips or dropped items. Re-siting one appliance can often halve those wasted movements.
Poor Traffic Flow
You introduce safety and usability problems when a primary walkway cuts through the cooking zone, particularly if aisle width drops below 900mm. A 1,200mm through-aisle is preferable in busy homes; narrower runs lead to collisions, blocked access to ovens or bins and higher hot-spill risk. Keep seating, bin access and door swings out of the main run to preserve smooth movement.
A renovation case widened an island run from 700mm to 1,100mm, moved the fridge to the run end and added a pocket door, which halved congestion and removed the pinch point at the hob. You can apply the same fixes: maintain a 1,000-1,200mm main route, group high-use appliances together and favour drawers over swing doors to speed access without blocking traffic.
Underestimating Storage Needs
When you underplay how much you use, kitchens quickly become messy and inefficient; for example, a family of four often needs space for a week’s groceries plus small appliances, which means planning more than the standard single 60cm pantry cupboard. Measure your most-used items – pots, mixers, cereal boxes – and allow shelving heights of 25-35cm for dry goods and 40-50cm for small appliances so you don’t sacrifice counter space to overflow.
Insufficient Cabinet Space
Failing to allocate enough cabinet volume forces you to leave appliances on the worktop and creates clutter that reduces usable prep area by an estimated 20-30% in many remodels. Aim to include specialised drawers: 15-20cm for cutlery, 30-40cm deep drawers for pots and pans, and a dedicated 60cm pantry or pull-out larder to prevent daily items from migrating to the counters.
Ineffective Use of Vertical Storage
Wasted vertical space above the fridge or unused wall heights are common mistakes that leave valuable capacity unused; tall cabinets to ceiling, staggered shelf heights and pull-down racks reclaim that volume. Store heavy items below shoulder height and reserve the topmost 30-40cm for infrequently used pieces to reduce the risk of accidents and improve daily accessibility.
Practically, you should specify full-height cabinets where possible – a 2.4m tall cabinet gains roughly 0.5-0.8m³ of extra storage compared with standard wall units. Use adjustable shelving with 32mm increment systems for flexibility, fit a pull-down shelf for plates, and install a 30-40cm over-fridge cupboard to use otherwise dead space; these measures increase organised capacity without widening your footprint.
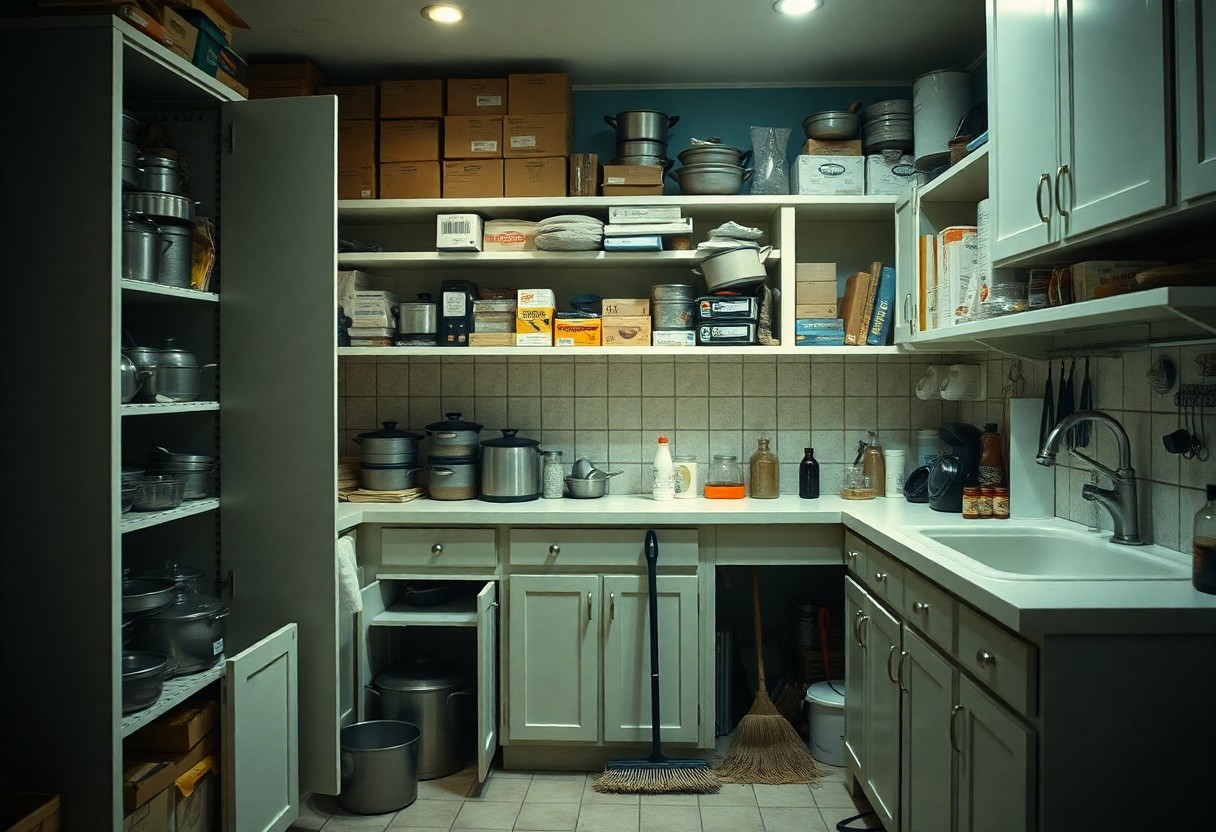
Inadequate Storage Solutions
When storage is skimped you end up stacking heavy cookware in awkward zones, increasing the chance of dropped pans and sprains; store pots in wide base drawers (60-80cm) or on pull-out trays and reserve upper cupboards for lightweight items. Incorporate corner carousels and a tall larder to reclaim space-these can recover up to 25% of previously unusable storage-so you reduce clutter and make prep far more efficient.
Overlooking Vertical Space
You often leave the wall plane unused; fitting cabinets up to a typical ceiling height of 2.4m or adding open shelves, rails and magnetic knife strips turns vertical real estate into accessible storage. Floor-to-ceiling units or stacked shallow cupboards can add up to 30% more usable storage, while a 150-300mm-high shelf above the sink handles cleansers and seldom-used items without impeding worktops.
Misplacing Frequently Used Items
You waste time when daily items live in deep or high cupboards; keep mugs, coffee, knives and chopping boards within 30-60cm of the kettle and prep zone, and store plates above the dishwasher at 50-70cm for ergonomic unloading. Placing heavy items lower and daily tools at arm’s reach reduces repetitive stretching and spill risk during busy routines.
Adopt a zone-based approach: designate a 600-900mm-wide breakfast area, a 900-1200mm prep area and a 600-900mm cooking zone, then place corresponding items in those zones. Use 90mm-deep utensil organisers, 300-400mm pull-out trays for baking sheets near the oven and spice pull-outs at eye level; in one small remodel, relocating mugs and cereal to lower shelves cut morning prep time by ~15-20% for the household.
Neglecting Lighting Considerations
You create shadowed worktops and uncomfortable glare if you skimp on kitchen lighting; aim for 300-500 lux on prep surfaces and about 150 lux ambient, choose 2,700-4,000 K lamps for natural colour, and position pendants roughly 700-900 mm above islands to avoid glare. Under-cabinet LED strips eliminate knife-shadowing, dimmers give flexible scenes, and consistent layering improves safety, cooking accuracy and overall resale appeal.
Inadequate Task Lighting
You’ll struggle to chop, read recipes or match colours under ceiling-only fixtures; provide direct illumination of 300-500 lux at the worktop edge with under-cabinet LED runs or adjustable track heads. Install continuous strips rather than point sources to avoid bands of shadow, and use matt-finish finishes to reduce reflected glare that increases the risk of cuts and plating errors.
Overlooking Natural Light
You miss a major resource when you ignore daylight: position prep zones within about 1-1.5 metres of a window to benefit from high-quality light that aids colour rendering and can substantially cut daytime electricity use; orient worktops to take advantage of south- or west-facing glazing where possible to maximise usable daylight hours.
You should also control that daylight: use translucent blinds or glazed rooflights of around 0.5-1.0 m² to diffuse top light, add high-level clerestory windows to bring even illumination across the working triangle, and fit external shading or opening vents to manage summer solar gain while keeping winter light that enhances depth perception and reduces artificial-light dependence.
Neglecting Adequate Counter Space
When you skimp on worktop area the kitchen rapidly becomes inefficient and unsafe; aim for at least a 1.0 metre continuous prep space between sink and hob with standard 600mm worktop depth for safe staging. Appliances and chopping zones need room, otherwise spills and cross-contamination rise. For further layout pitfalls and fixes see Common Kitchen Layout Mistakes (And How to Avoid Them).
Underestimating Preparation Areas
You often underestimate how much clear surface you need for mise en place; even a single cook benefits from 1-1.2 metres of dedicated prep beside the sink. In flats where only 400-600mm was provided, food prep became hazardous and slow. Plan zones for chopping, mixing and appliance use so you can work without moving ingredients constantly.
Failing to Include Islands or Peninsulas
You lose valuable work, storage and sociable seating when you omit an island or peninsula; a practical island is typically at least 1.2 metres long and 0.6 metres deep, with 1.0 metre clearance all round to maintain workflow. Islands double as prep stations, drainage staging and informal dining, improving efficiency and resale appeal.
When you add an island consider services: routing plumbing or installing a hob requires plan for ventilation and sockets. Allow 650-750mm clearance above a hob and keep at least 1.0 metre walkways; if space is under 2.4 metres, a peninsula often delivers similar benefits with lower rewiring and plumbing costs.
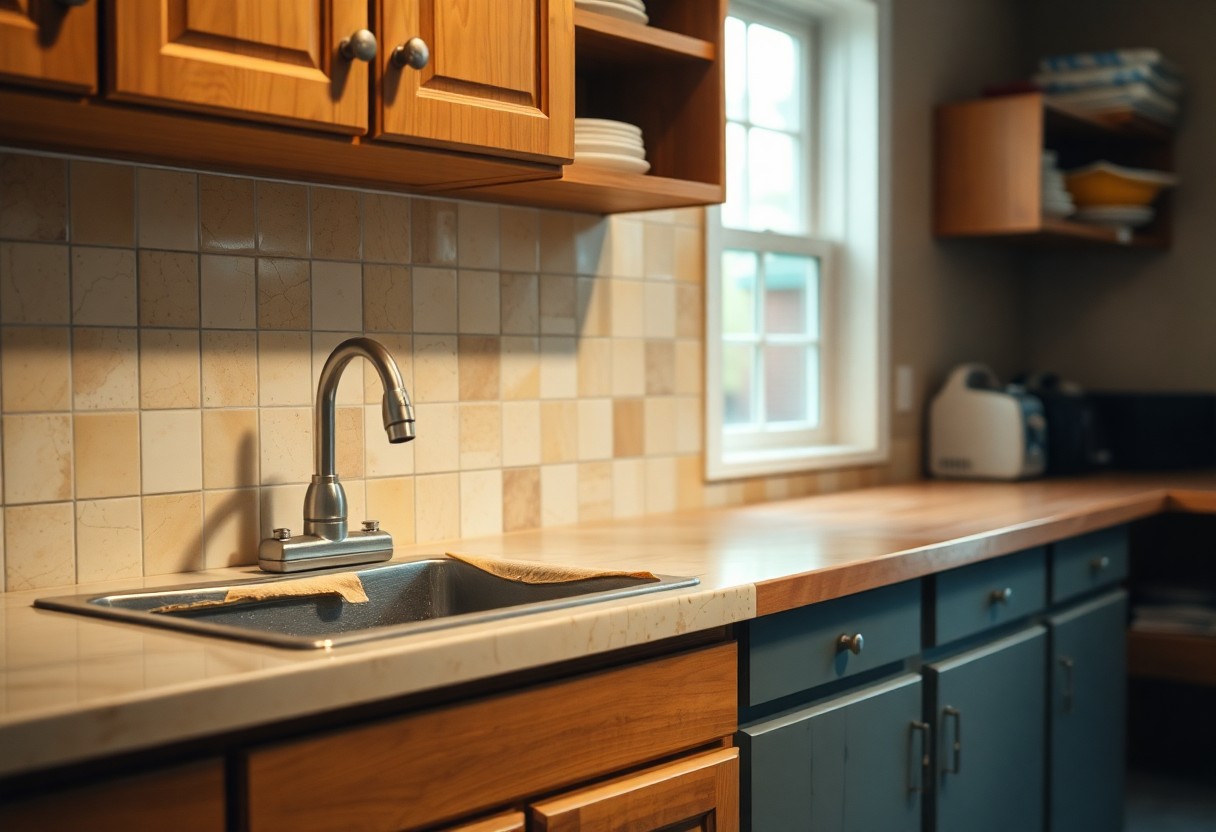
Choosing the Wrong Materials
If you pick materials for style over suitability, you’ll pay later: a marble worktop in a busy family kitchen will stain and etch, while cheap laminate may peel or swell within 5-10 years. Choose materials by use-benchtops near cookers need heat- and stain-resistant surfaces, wet zones require water-resistant joinery, and heavy drawers demand durable runners. Warranties often range from 5 to 25 years, so mismatch can mean early replacement costs that dwarf initial savings.
Durable vs. Aesthetic Choices
You must balance looks and longevity: quartz is non‑porous, resists stains and often has a 10-25 year warranty, while marble scores ~3-4 on the Mohs scale and etches easily. Granite (Mohs 6-7) tolerates heat and scratches but needs periodic sealing. Solid wood brings warmth but requires oiling; stainless steel is hygienic yet shows scratches. Use durable surfaces in work zones and reserve delicate finishes for islands or display areas.
Ignoring Maintenance Requirements
You’ll face failures if maintenance is neglected: granite typically needs sealing every 1-3 years, timber oiling every 6-12 months, and extractor filters replacing every 3-6 months. Neglect can cause staining, mould, warping and may void manufacturer warranties, turning a small chore into a large expense.
For example, a family of four left a butcher‑block unsealed and saw warping within two years; an unsealed granite benchtop developed permanent oil stains. You should follow a simple checklist: reseal stone as recommended, oil timber, use pH‑neutral cleaners, avoid abrasive pads on coated surfaces, always use chopping boards, and keep vents and filters serviced-professional resealing costs about £50-£150, while full replacement of warped timber can be £800-£2,000.
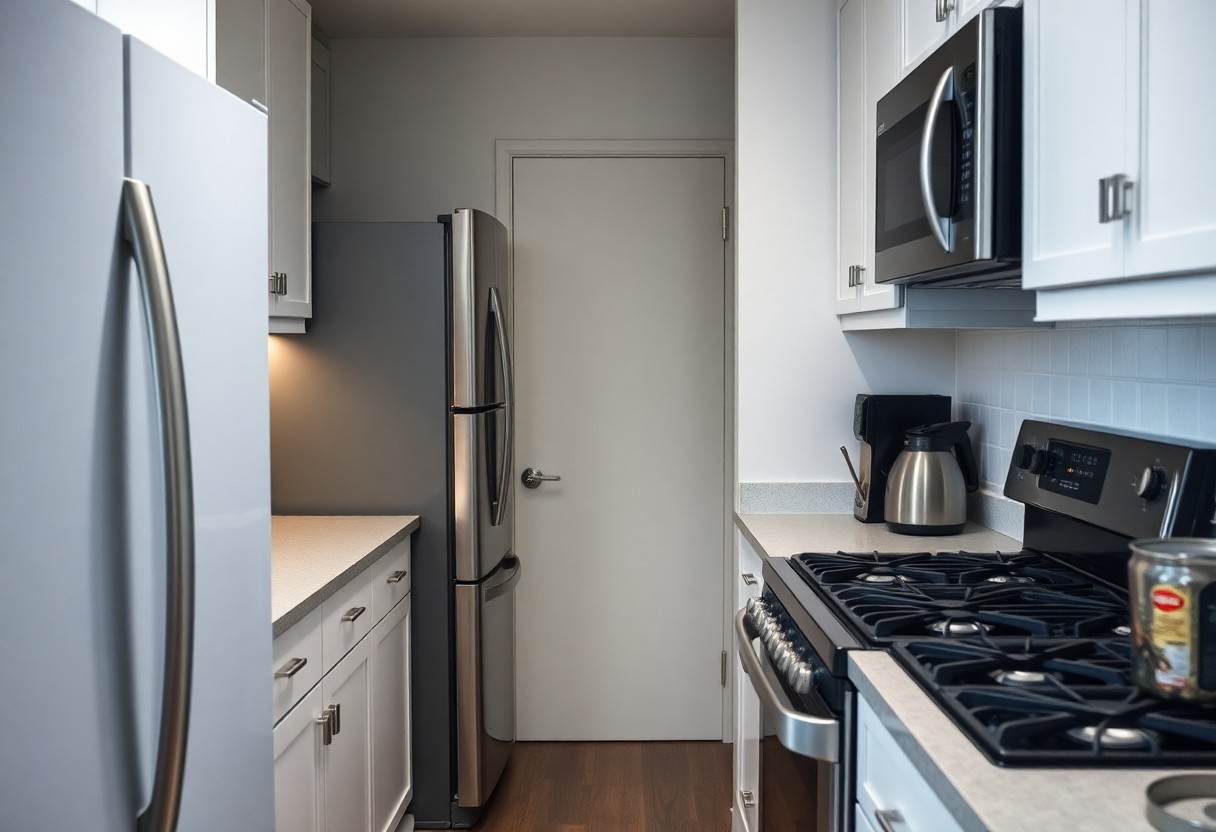
Wrong Appliance Placement
When appliances are sited without regard to clearances and the work triangle you end up with inefficiency and safety issues; designers advise triangle legs of 1.2-2.7 metres and main aisle clearances of at least 1.2 metres. Placing a fridge at one end of the kitchen and the hob at the other adds needless steps, while locating ovens or dishwashers where doors swing into walkways creates a trip and burn hazard. You should prioritise functional distances and door arcs when positioning appliances.
Clashing with Workflow
If the fridge, sink and hob are scattered you interrupt meal prep-fetching ingredients from a fridge 3-4 metres away multiplies trips and time. Mounting a microwave above a tall fridge forces awkward reaches and poor sightlines, and situating the prep area between two full-height cabinets reduces usable counter space. You should align appliances so the typical sequence-store, prep, cook, clean-flows in near-straight paths to cut wasted movement.
Blocking Access to Essential Appliances
Fitting a dishwasher where its open door extends into a main circulation route is a common error: a dishwasher door typically projects about 0.5-0.6 metres when open, and ovens/hobs need roughly 0.9 metres clear in front for safe unloading. You create pinch points if appliance doors interfere with each other or with seating, and that directly increases spill and burn risk. You must check door arcs during layout planning.
Practical fixes include siting the dishwasher adjacent to the sink within about 0.3-0.6 metres for easy transfer, specifying an oven with a downward-opening door only where 0.9-1.0 metres clearance exists, or using integrated models and reversible door hinges to avoid obstructing traffic. In tight kitchens consider pocket doors, appliance garages or placing heavy-use units at run ends so open doors do not cross walkways; these adjustments cut both risk and wasted motion.
Overlooking Appliance Placement
Inefficient Workflow
If you place the fridge, sink and hob without following the work-triangle guidelines you create wasted steps. Aim for each triangle leg to be between 1.2 and 2.7 metres and a total perimeter of roughly 4-7.9 metres. In one small 12 m² refit, shifting the fridge 1.5 metres nearer the prep area cut meal-prep time by an estimated 20%-so position appliances to minimise movement and speed up routines.
Cluttered Countertops
When you cram small appliances across the worktop you lose valuable prep runs; target at least 1 metre of uninterrupted worktop beside the sink or hob. Keep daily-use items like the kettle in a dedicated zone and store occasional gadgets in cupboards to avoid a fire risk and make cleaning faster-this also improves safety when multiple people cook together.
To further reduce clutter, install under-cabinet sockets and an appliance garage so you can tuck devices away while keeping them accessible; fit sockets roughly every 600 mm along the backsplash. You should also consider a tall housing unit for the microwave at eye level (around 1.4 metres) and drawer storage for bulky mixers, which frees up worktop space and streamlines your prep workflow.
Forgetting Lighting Essentials
When you ignore lighting layers you end up with a kitchen that looks pleasant but performs poorly; combine overhead downlights, pendants and under-cabinet strips to hit the recommended 300-500 lux at worktops and avoid dangerous shadows. Under-cabinet LEDs and dimmers let you control contrast and ambience, and case studies show layered lighting reduces mistakes when chopping or handling hot pans. For more layout pitfalls see 10 Common Kitchen Layout Mistakes and How to Avoid …
Inadequate Task Lighting
You often rely on a single ceiling fitting that casts deep shadows across work surfaces; fit continuous under-cabinet LED strips at 300-500 lux with a neutral 3000-3500K to render food colours accurately. Surface-mounted puck lights create hot spots, whereas linear LEDs give even illumination across sinks and chopping zones. Install switches or dimmers local to prep areas so you can raise output to full when you’re using sharp knives or hot pans-poor task light is a common cause of cuts and spills.
Ignoring Natural Light
You might place your main prep zone far from glazing, cutting off free daylight that reduces reliance on artificial light and improves safety. South- or west-facing windows deliver stronger afternoon light; north-facing glazing provides steady, glare-free illumination. Where possible, position the island or main worktop within about 2 metres of a window to maximise daylight contribution and reduce evening artificial-light hours.
To maximise incoming daylight, consider rooflights or a glazed splashback and use pale, reflective surfaces-high-gloss units and light-colour worktops can bounce light deeper into the room. Clerestory windows or a slim horizontal window above the sink preserve privacy while admitting top-down light, and adjustable blinds control glare without blocking useful daylight. These moves also lower energy use and make your kitchen feel larger and safer when you’re working.
Forgetting About Safety
Overlooking safety turns smart design into a hazard; if you squeeze traffic aisles below 1.2 metres or scatter sharp corners and hot zones, you raise the risk of collisions, scalds and dropped pans. Use the work-triangle guideline (total 4-7.9 m) to keep sink, hob and fridge efficient yet safe, and position landing spaces of at least 60 cm beside appliances so you can set down hot dishes without stepping into a walkway.
Dangerous Layouts
Placing a hob opposite a bay with a fridge or dishwasher often creates a pinch point where people cross paths; islands with less than 1.2 m clearance force you to turn with hot pans. Avoid ovens that open into main circulation routes, stagger door swings, and don’t locate the hob next to a doorway where traffic can cause scalds or knocked pans.
Poor Accessibility for Emergencies
Blocking an exit with cabinetry or siting shut-off valves behind heavy appliances delays response when gas, electrical or fire incidents occur. Fit the gas and electrical isolation in plain reach, keep a visible fire extinguisher and blanket near the hob, and ensure pathways to the external door remain free and at least 1.2 metres wide.
To improve emergency access, label and test isolators during installation, mount a fire blanket within arm’s reach of the cooktop, and plan appliance placement so you can reach controls without moving more than one step. Installing pull‑cord alarms or a clearly signed route to the exit cuts evacuation time; in practice, these small choices can shave crucial seconds from any household emergency response.
Skipping the Design Plan
Skipping a proper design plan often leads to costly changes and wasted space; one renovation study found unplanned alterations can raise bills by up to 20%. When you proceed without measured drawings you risk misplaced services, cupboards that won’t fit, and conflicts with building regs. Assessing clearances, sight lines and plumbing runs in advance prevents late-stage structural work and ensures your layout functions for daily use and resale value.
Rushing the Layout Decision
Rushing layout choices commonly produces islands that block traffic and ovens that clash with door swings. Allow a minimum of 1 metre (39 in) clearance around islands and aim for a functional work triangle-total leg length ideally under 7.9 m. Test arrangements with taped floor plans, move mock-up appliances, and measure door swings; these simple checks stop expensive relocations after units are fitted.
Failing to Consider Future Needs
Failing to plan for future needs forces retrofits later: growing families often need extra storage, ageing occupants require wider access, and new appliances demand more power. Plan your kitchen for the next 5-10 years, allow for space for a second oven or full-height fridge, and design flexible storage that can adapt as needs change.
More detail: install spare conduits for future electrics and data, provide extra dedicated power points, and consider doorway widths of at least 800 mm for accessibility. Also check floor loading and reinforce beneath heavy islands if you anticipate built-in ranges. These measures add little upfront cost but avoid disruptive, expensive upgrades later.
Summing up
Drawing together, you should prioritise a clear work triangle, adequate storage and durable surfaces, efficient appliance placement and sensible traffic flow so your kitchen operates smoothly. Plan lighting, ventilation and task zones to avoid wasted steps or unsafe setups, and scale cabinets and islands to your space so functionality matches style.
Conclusion
As a reminder you should prioritise workflow, balance storage and prep areas, and maintain clear sightlines and safe circulation to avoid cramped, inefficient spaces; place appliances to support the work triangle, ensure adequate lighting and ventilation, and select surfaces that withstand use, so your kitchen is both functional and comfortable for daily tasks.
FAQ
Q: How can a poor work triangle affect kitchen efficiency and how should it be laid out?
A: A dysfunctional work triangle-poorly placed sink, hob and fridge-creates unnecessary steps and congestion. Aim for each leg of the triangle to be between 1.2m and 2.7m, with a total perimeter of roughly 4m to 8m for an efficient workspace. Avoid placing appliances on opposite sides of a walkway and ensure clear floor space in front of each primary zone so doors and drawers can open without blocking movement. In open-plan kitchens, maintain separate circulation routes so the cooking triangle does not conflict with social or dining areas.
Q: What storage mistakes should I avoid when planning a kitchen?
A: Underestimating storage needs and using deep, inaccessible cupboards are common errors. Incorporate a mix of drawers, pull-out larders and adjustable shelving to keep frequently used items reachable; utilise vertical space for trays and baking sheets. Plan specialised storage for pots, pans, chopping boards and food containers, and allocate an organised pantry near the work area. Consider soft-close mechanisms and full-extension runners so contents are easy to access, and avoid placing heavy storage in high, awkward-to-reach cupboards.
Q: How does lighting impact kitchen usability and what lighting mistakes occur most often?
A: Relying on a single central light causes shadows on the worktop and poor task visibility. Use layered lighting: ambient for overall illumination, task lighting under wall units and over the sink or hob, and accent lighting to highlight features. Choose appropriate colour temperature (around 2700-3500K for a warm but clear light) and install dimmers to adapt brightness for different activities. Position fixtures so they do not cast shadows where food is prepared and ensure switches are conveniently placed for work zones.
Q: What should be avoided when placing appliances and choosing their sizes?
A: Incorrect appliance placement and inappropriate sizing create awkward workflows and clearance problems. Position the dishwasher next to the sink, the hob near adequate ventilation and the fridge with easy access from the main entrance. Match appliance sizes to household needs and site them so doors and drawers can open fully without obstruction. Plan for required service connections and ventilation clearances early in the design, and avoid placing ovens or microwaves at impractical heights that force lifting hot items at shoulder level.
Q: What are common island and peninsula layout mistakes and how can they be prevented?
A: Making an island too small, too large or too close to surrounding units disrupts circulation and functionality. Allow at least 1m clearance on all sides (1.2m for active cook zones and multiple cooks) so people can pass and work comfortably. If seating is included, provide knee space and ensure the cooktop or sink on the island has proper ventilation and plumbing access. Design islands to support multiple tasks-preparation, dining and storage-while ensuring they do not become traffic funnels that interrupt the work triangle.