
Design your wrap-around extension to maximise flow and natural light, using open-plan layouts, glazed corners and integrated storage so you gain more usable living space; check planning permission and involve an architect early to avoid costly delays, and ensure structural integrity is assessed to mitigate dangerous risks; you can also use level thresholds, built-in furniture and mirrored finishes to create a sense of breadth without increasing footprint.
Understanding Wrap-Around Extensions
What is a Wrap-Around Extension?
Typically a wrap-around extension runs along the rear and at least one side of your home, creating an L-shaped addition that ties into existing rooms. You can gain 15-50 m² of ground-floor space depending on plot; common uses include expanded kitchen-diners, family rooms or utility zones. Be aware of foundations, drainage relocation and party-wall requirements when connecting to neighbouring properties.
Benefits of a Wrap-Around Extension
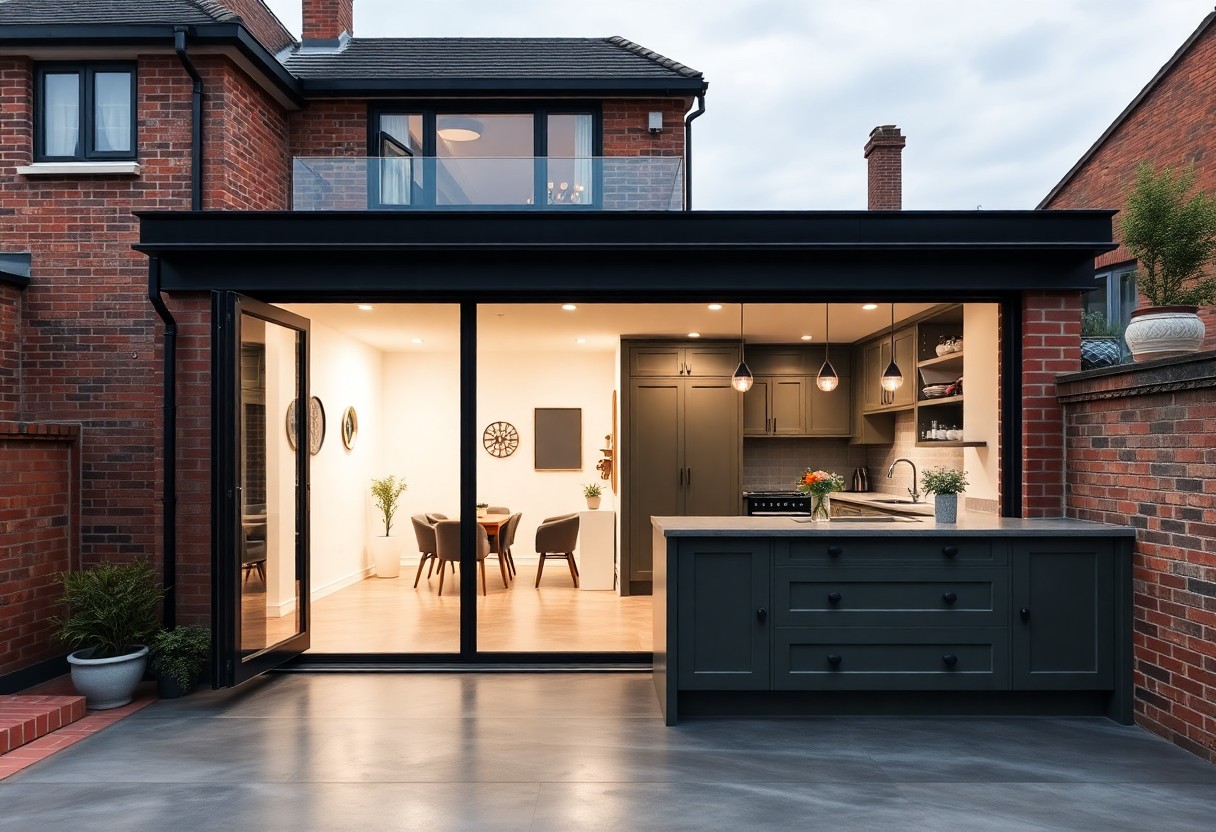
Beyond extra floor area, you’ll benefit from improved natural light, circulation and sightlines, which support open-plan living and contemporary layouts. Many homeowners see a 5-15% uplift in resale value after a well‑executed wrap-around, especially when combined with high‑quality glazing and upgraded heating. Also factor in contractor access and the temporary loss of outdoor space during works.
For example, a 3m by 6m wrap-around (18m²) can convert a galley kitchen and separate dining room into a single 30m² family hub with an island and seating for six. Typical build costs range from £1,500-£2,500/m², and under Permitted Development single-storey rear extensions are limited to 50m³ for terraced and 70m³ for detached – check your local council early.
Designing Your Wrap-Around Extension
When planning a wrap‑around extension, prioritise flow between existing rooms and the new footprint; a 6m x 4m addition yields 24m² that can accommodate a kitchen-diner and living area if you zone smartly. Use built-in storage and align services to avoid costly rerouting. Engage a structural engineer early because removing load-bearing walls and incorrect steel sizing are high-risk and will drive time and expense.
Choosing the Right Layout
Consider open-plan or connected zones depending on how you live: allow minimum circulation of 1.2m between an island and units, size a dining table at around 1.8m for six people, and locate utility/boot spaces to the side to keep clutter away. If you need distinct rooms, use glazed screens to maintain light while giving acoustic separation so your layout remains flexible and practical.
Maximising Natural Light
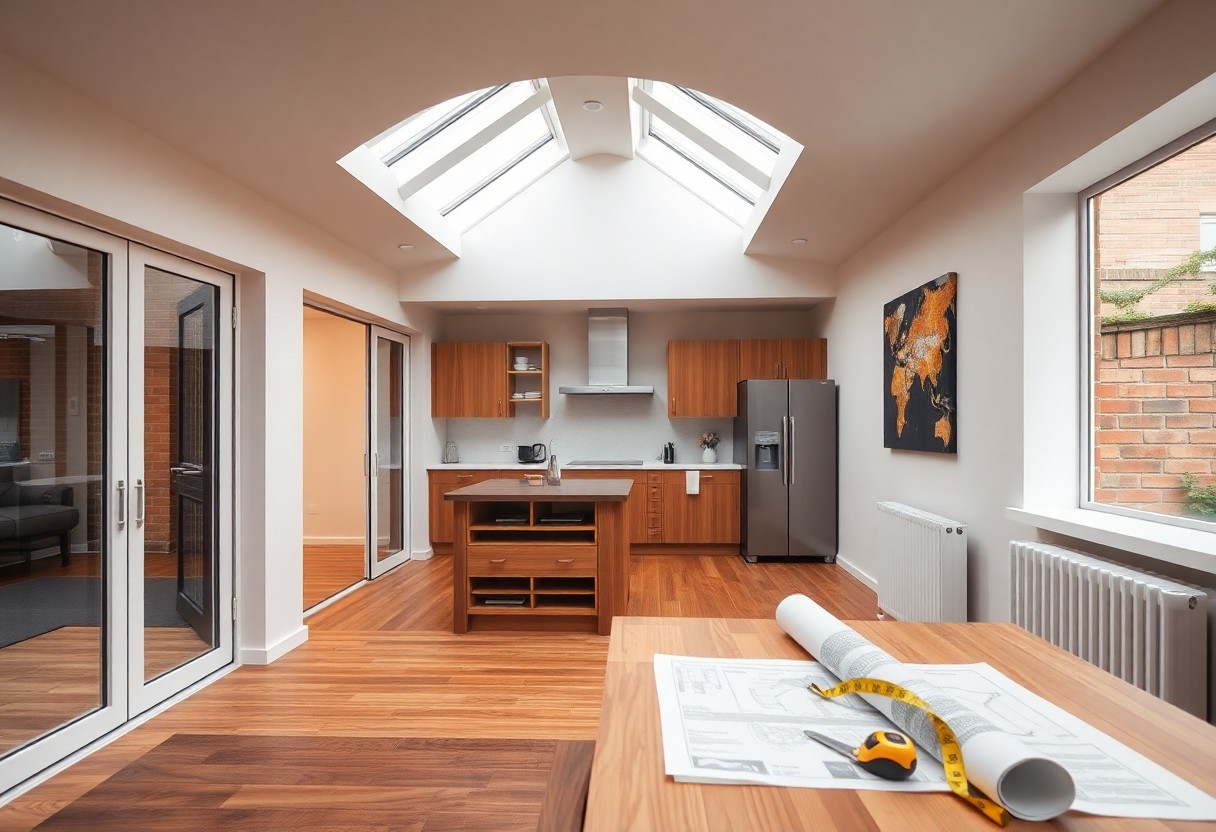
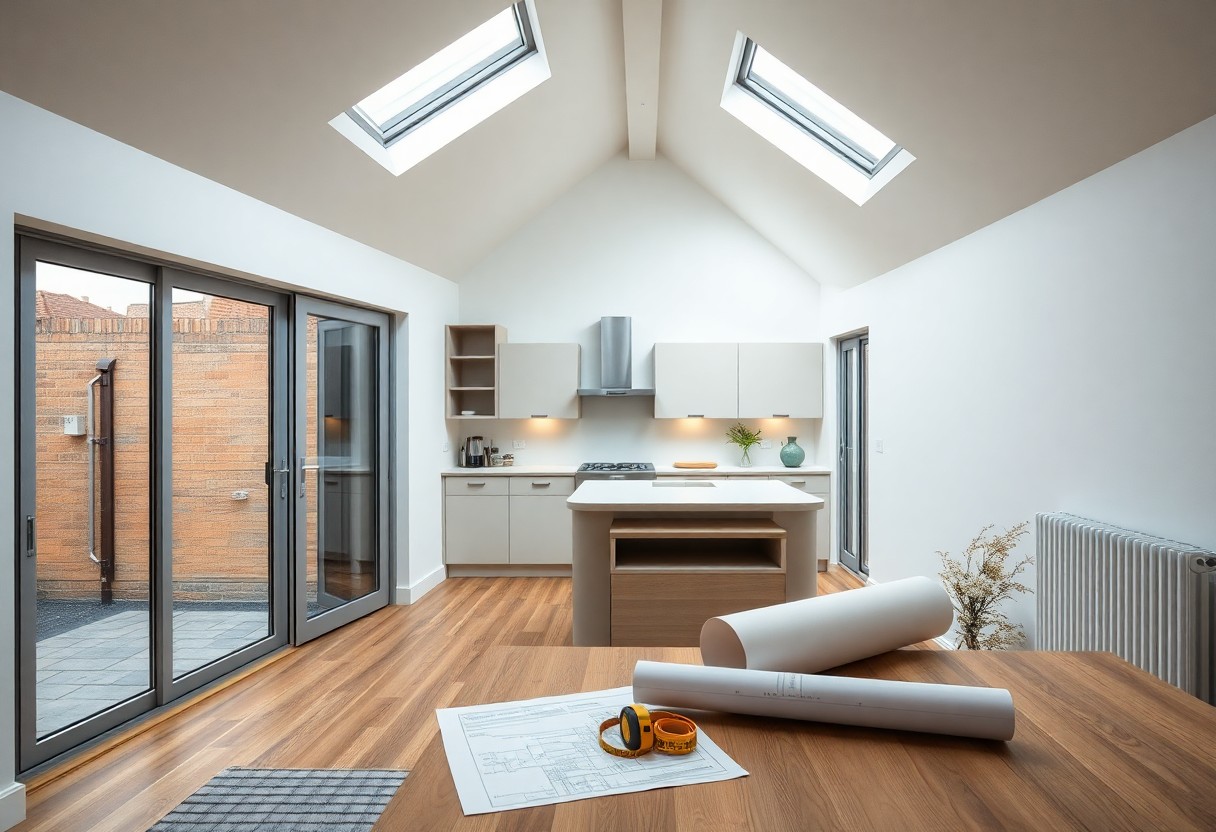
Position glazing to take advantage of orientation: south-facing glazing gives the most light but increases solar gain, so pair large aluminium doors with low-e coatings and consider triple glazing with U-values near 1.1 W/m²K to balance comfort and performance; rooflights can boost usable daylight in deep plans by roughly 20-30%, helping you avoid dark rear zones.
Use a mix of strategies to distribute light further into the plan: install a glazed corner, add three 1m x 1m rooflights across a 6m run for even top-lighting, and specify pale, high-reflectance finishes on ceilings and walls. You should also incorporate external shading or solar-control glass to mitigate glare and overheating during peak summer months.
Practical Tips for Space Maximisation
You can make a wrap-around extension work harder by zoning and planning storage early: a 3m x 4m extension adds 12m² you can split into distinct functions, while glazing and sightlines boost perceived room. Use sliding doors to save about 0.5m of swing per opening and group services to limit costly runs. Prioritise built-ins over freestanding pieces for continuous sightlines. This will dramatically improve daily flow and usability.
- You should specify smart storage: floor-to-ceiling units, 300mm recessed shelves and 80% extension runners.
- You can create multi-functional spaces with fold-down desks, sofa-beds and a 1.2m bench with hidden drawers.
- You must orient glazing to extend perceived space and align views with existing circulation.
- You should group plumbing and electrics within 2m of existing runs to save on build cost and retain usable floor area.
Multi-Functional Spaces
If you design multi-functional spaces properly, you can combine a home office, dining and guest sleeping without compromise: fit a wall-mounted desk that folds to 0.2m depth, add a Murphy bed with 90cm clearance and select a 1.8m sofa-bed for daytime seating. Slide or pocket doors enable privacy without swing loss, and a compact island (900mm x 600mm) can serve as prep, dining and homework hub while preserving circulation.
Smart Storage Solutions
You should exploit vertical space with smart storage: install floor-to-ceiling cabinets up to 2.4m high, use recessed niches at 150mm depth for books or display, and fit 300-400mm pull-out larders to replace bulky cupboards. Add organisers, full-extension runners and toe-kick drawers to increase accessible capacity without expanding footprint, and balance open shelving with concealed units to control clutter.
Replace three freestanding cupboards (each ~0.5m wide) with bespoke wall units to reclaim roughly 1.5m of linear floor frontage and gain deeper, 600mm-deep storage for appliances; specify adjustable shelves at 300mm intervals, soft-close drawers and ventilation behind tall units for fridges. If you opt for moisture-resistant finishes in kitchen areas, you’ll protect contents and reduce maintenance while keeping the extension feeling airy.
Architectural Considerations
When wrapping an extension around your home, you must reconcile rooflines, natural light and circulation with structural constraints. Stepping roof eaves, aligning floor levels and planning roof glazing will determine usable space; you can often achieve 15-35% extra living area by optimising layout. Consult a measured survey and consider thermal performance, drainage rerouting and service runs early so design and engineering avoid costly alterations later.
Planning Permissions and Regulations
Permitted Development often covers single‑storey rear extensions up to 3m for terraced/semi‑detached houses and 4m for detached, beyond which full planning or prior approval is likely. Conservation areas, listed status or restrictive covenants will require consent. You must also comply with Building Regulations and the Party Wall Act; submit drawings to your local planning authority and factor in typical lead times of 6-12 weeks for decisions to avoid delays to construction.
Integration with Existing Structures
When tying a wrap‑around to existing fabric, you need accurate structural calculations: openings often require an RSJ span of 3-6m, and foundation type may need underpinning or piled solutions if soil bearing is poor. Pay attention to damp‑proof course continuity, roof junctions and matching brick bonds; mismatched eaves or floor levels create thermal and moisture risks. Involve a structural engineer and contractor early to sequence works and safeguard existing structure.
Survey trenches or trial pits will reveal whether you can use strip foundations or must opt for piles; in a London terrace case study removing a rear wall required underpinning over a 6m run with a two‑week temporary propping programme. You should programme service diversions (gas, water, drainage) before excavation, obtain a Party Wall Award where neighbours are affected and include detailed waterproofing and insulation notes to prevent long‑term defects.
Budgeting for Your Extension
Cost Breakdown
Start by itemising core costs: basic build £1,200-£2,500/m², architect and structural engineer fees ~5-10% of build, planning and building regs £1,000-£3,000, and internal finishes which can double basic costs. For a 20m² wrap-around you might budget £30,000-£50,000 plus a 10-15% contingency for unseen works such as foundation issues or asbestos removal, which are the most expensive surprises.
Financing Options
Consider secured borrowing like remortgaging to release equity, often cheaper with rates from around 3-6%, or unsecured home improvement loans with quicker approval but higher rates. You could use a second-charge mortgage, a bridging loan for faster projects, or a dedicated builder’s payment plan. Avoid relying on high-rate credit cards; instead compare total cost, fees and flexibility so you choose the option that keeps your project viable.
For example, remortgaging to release £50,000 at 4% over 25 years would increase repayments by roughly £260-£270/month; fees such as valuation and arrangement typically range £150-£1,000. Secured options lower interest but add mortgage fees and can incur early repayment charges, while unsecured loans avoid re-mortgaging but cost more. Get a mortgage broker to compare deals and check lender criteria and LTV limits before you commit.
To wrap up
Drawing together the main strategies, a wrap-around extension lets you maximise space by opening sightlines, integrating built-in storage, choosing sliding or pocket doors, and using consistent flooring to flow between old and new. By prioritising natural light, flexible furniture, clear circulation routes and careful planning you create a spacious, adaptable home that meets your needs.
FAQ
Q: How can a wrap-around extension be designed to maximise usable floor space?
A: Prioritise an open-plan layout that removes unnecessary corridors and creates continuous sightlines from one area to another. Align structural supports with walls where possible to avoid obstructive columns, and use sliding or pocket doors to reclaim floor space taken by swinging doors. Integrate the extension with existing circulation routes so the layout feels cohesive rather than an add‑on. Consider extending the footprint to embrace corners of the garden, using cantilevers or slimmer foundations where site constraints apply to gain extra square metres without an oversized footprint.
Q: What storage strategies make the most of a wrap-around extension?
A: Use bespoke, built-in storage that follows wall lines and fills recesses to avoid wasted voids. Floor-to-ceiling joinery, window seats with internal compartments, and recessed shelving in wall cavities convert nominal wall space into usable storage. Incorporate multifunctional elements such as bench seating with lift-up lids, storage steps, and integrated appliance cupboards. Plan utility and media storage adjacent to service cores to centralise plumbing and electrics, and use corners with customised units to convert awkward spaces into organised storage.
Q: How should glazing and daylighting be handled to enhance perceived space?
A: Maximise glazing along the wrap-around façade with full-height doors or windows to visually extend the interior into the garden. Use rooflights or clerestory windows to bring light deep into the plan without compromising privacy, and choose slim-frame glazing to increase glazed area. Maintain consistent floor levels and sightlines to the outside to avoid visual breaks, and specify high-performance glazing to balance daylight with thermal comfort. Internally, use pale finishes and reflective surfaces to amplify natural light and make spaces feel larger.
Q: What role does multifunctional furniture and zoning play in space maximisation?
A: Define zones with flexible, multifunctional furniture rather than fixed partitions. Items such as extendable dining tables, fold-down desks, modular sofas and sliding screens allow spaces to adapt to different activities without needing extra rooms. Use built-in benches and shelving to delineate areas subtly while providing storage. Position furniture to maintain clear circulation paths; ensure primary routes are at least 900-1000 mm wide to avoid cramped movement and preserve the feeling of spaciousness.
Q: Which planning, structural and practical considerations affect the amount of usable space gained?
A: Early engagement with an architect and structural engineer will identify constraints such as party walls, foundations, drains and party-line setbacks that can limit usable area. Building Regulations, local planning constraints, roof heights and eaves lines can influence design choices; in conservation areas or on complex sites you may need pre-application advice. Factor in insulation, ventilation and service runs when arranging floors and ceilings to avoid losing headroom or requiring bulky bulkheads. Budget for efficient structural solutions (e.g. steel beams, micro‑piles) that reduce internal columns and maximise clear spans, and plan contiguous flooring and consistent finishes to make the new and existing spaces read as one larger area.