
There’s a simple action plan you can follow to protect your roof this winter: inspect flashings and gutters for blockages; clear heavy snow safely or hire professionals to avoid falls; tackle ice dams early to stop water ingress; ensure adequate insulation and ventilation to extend your roof’s life and save on costly repairs.
Maintenance starts by clearing gutters and safely removing snow so you avoid ice dams and reduce fall risk; you should inspect for damaged shingles, seal gaps to prevent leaks and use a roof rake or hire a professional when conditions are hazardous so you extend your roof’s lifespan and protect your home.
Understanding Winter Roof Challenges
You’ll face freeze-thaw cycles that widen hairline cracks, and periods of thaw followed by rapid refreeze that form ice dams at eaves. Heavy, wet snow can add 100-200 kg/m² to roof load on low-pitch sections, while wind-driven snow and grit accelerate wear. Faulty ventilation and inadequate insulation make heat loss worse, increasing the chance of water ingress around flashings and chimneys.
Common Winter Weather Factors
You should monitor temperature fluctuations, precipitation type and volume, prevailing wind and coastal salt spray, since each affects your roof differently. In upland or exposed locations you may see multiple freeze-thaw cycles per week, and in coastal zones salt increases corrosion of metal flashings. Recognizing how these factors combine will help you prioritise inspections and interventions; see the common issues listed below.
- Snow load
- Ice dams
- Freeze-thaw cycles
- Wind-driven snow
- Blocked gutters
Effects of Snow and Ice on Roofs
Snow and ice increase static loads and cause differential melting that forces water under tiles, leading to flashing failure and ridge leaks; sustained weight can produce visible sagging or deflection on older roofs. Ice within valleys and gutters can displace fixings and tear soffits, and an ice dam can hold meltwater against roofing for days, greatly raising the risk of interior damage.
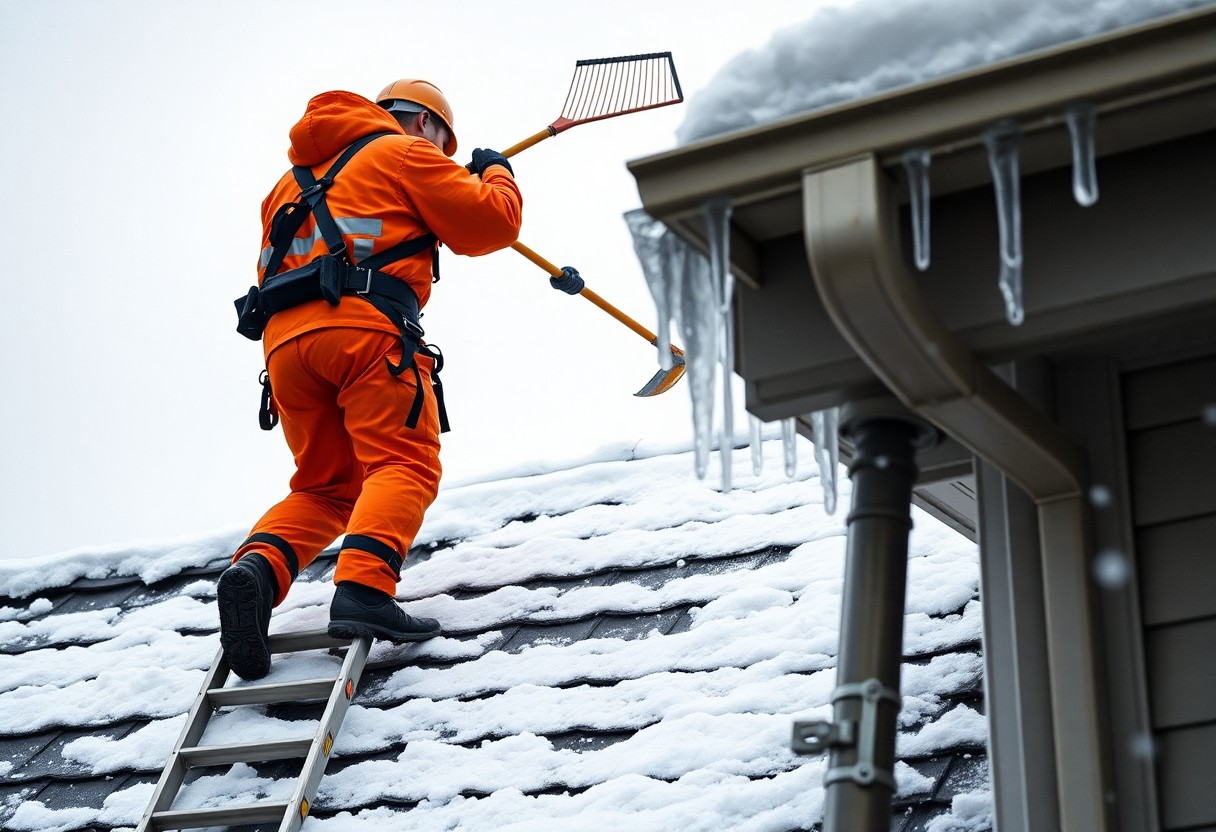
To limit harm you should clear snow early using a long-handled roof rake from the ground and avoid walking on icy surfaces; consider removal once dense, wet snow exceeds about 15 cm depth or you notice any sagging. Upgrading insulation and improving ventilation reduces melt patterns that cause ice dams, and installing heat cables or hiring a professional for safe removal are sensible measures for persistent problems.
Understanding Winter Roof Challenges
Cold months intensify common failure modes: repeated freeze-thaw cycles widen hairline cracks, snow loads add point pressures that can exceed attic design loads, and blocked drainage accelerates rot around eaves. You should expect ice formation in valleys and around roof penetrations, with wind-driven rain forcing water beneath shingles. Prioritise inspection of flashings and gutter outlets, and treat any standing water immediately to prevent water ingress and structural decay.
Common Weather Factors
You will face several weather-driven risks that act together to damage your roof:
- Snow accumulation – heavy loads can exceed 150 kg/m² on flat areas
- Ice dams – trap meltwater and cause back‑flow under coverings
- Wind uplift – gusts over 70 km/h can dislodge tiles or shingles
- Freezing rain – creates glaze that stresses seals and gutters
Perceiving how these elements combine lets you prioritise targeted interventions like rapid roof clearing and timely flashing repair.
Roof Material Considerations
Your choice of covering changes how you manage winter risks: asphalt shingles typically last 20-25 years and show granule loss under freeze-thaw, metal roofs shed snow quickly and can last 40-70 years but need attention to fasteners, slate and tile resist rot yet are vulnerable to impact and broken battens. You should match maintenance frequency to material performance and expected winter exposure.
For more depth, inspect asphalt for curled edges and granule accumulation in gutters after each major storm, and replace damaged sections within weeks to avoid secondary leaks. With metal, check for corrosion at laps and ensure screws have neoprene washers; coastal sites may need annual checks. For slate or clay tile, look for cracked pieces and slipped battens after high winds, and have broken tiles reseated by a roofer-professional inspections every 3-5 years reduce the chance of hidden failures. Ensure flashings around chimneys and vents are refastened and sealed before prolonged freezes.
Regular Roof Inspections
You should inspect every three months and after heavy weather; use binoculars from the ground and climb only when surfaces are dry. In winter check for ice dams, lifted slates and blocked gutters, and inspect the loft for damp patches or daylight through the battens. If you spot sagging, exposed nails or moss covering more than 30% of the roof, plan repairs promptly.
How to Inspect Your Roof for Damage
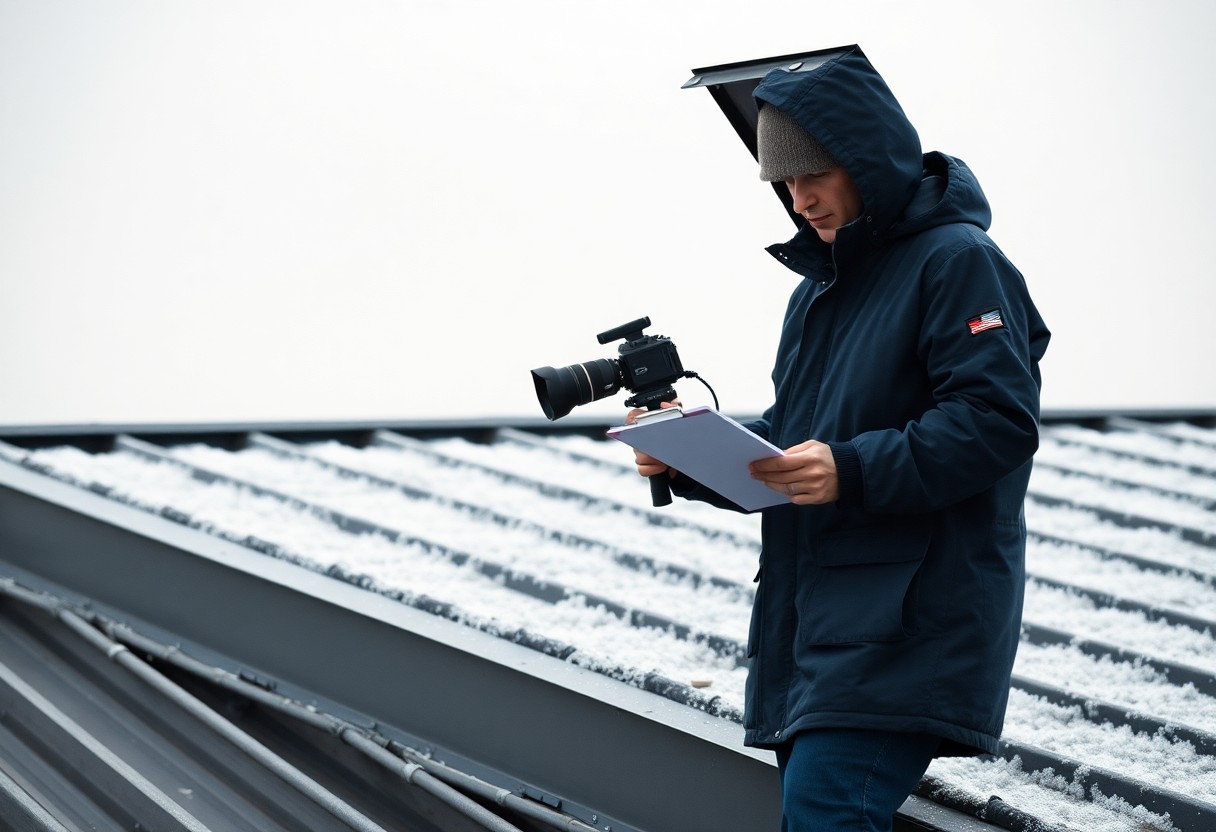
From ground level you can use binoculars to spot missing tiles, cracked mortar or lifted flashing, then enter the attic with a torch to check for water stains, mould or daylight through the roof deck. Avoid walking on icy or steep roofs over 30°; instead photograph problem areas, note measurements in square metres and log dates so you can show clear evidence to tradespeople.
When to Schedule Professional Inspections
You should arrange a professional inspection annually and after severe weather-storms delivering over 50 mm of rain, winds above 50 km/h or snow depths past 15 cm. Call a roofer sooner if your roof is older than 20 years, you discover sagging or persistent leaks, or tiles have been blown away; professionals will safely assess structural timbers and give a repair or replacement timeline.
You can expect professionals to use drones, thermal imaging and moisture metres to run a 20-30 point check, examine flashings, valley liners and chimney collars, and estimate remaining life (commonly 10-25 years for tiled roofs). You should receive a written report and a clear quote; typical inspection fees are around £75-£200, while full surveys with detailed reports may cost £150-£400.
How to Inspect Your Roof
Inspect your roof at least twice a year and after storms with winds above 40 km/h (25 mph). Begin with a ground survey using binoculars to spot missing tiles, lifted flashing or ice dams at the eaves, then check your loft for water stains or mould. Note gutter blockages and any sagging, take dated photos, and prioritise repairs based on risk and location.
Identifying Potential Issues
Check for cracked, slipped or bare patches where granules have worn away; moss covering more than 20% of a slope retains moisture and accelerates decay. Inspect flashing for corrosion or gaps, seals around vents for splits, and battens for sagging. In one case study, leaks developed within six months where flashing gaps exceeded 5 mm, so log gaps over 3 mm for professional attention.
Safety Precautions During Inspection
Always set a ladder at a 4:1 ratio with a competent person as a spotter and avoid climbing when surfaces are wet, frozen or winds exceed 40 km/h. Wear non-slip boots, gloves and a helmet; if the roof slope is over 30° use a fall-arrest harness. Where access is risky, rely on binoculars or a roof camera rather than walking the roof, and do not walk on icy roofs.
Position the ladder base 1 m out for every 4 m of height and secure the ladder at the top or tie it off; always place it on firm, level ground and test a few rungs before ascending. Use a tool belt or hoist to avoid carrying loads while climbing. If you need a harness, choose one with an energy-absorbing lanyard and attach to a certified anchor, or hire a professional for steep, high or complex pitches.
Effective Snow and Ice Removal Techniques
After heavy falls, clear snow within 24-48 hours where possible to reduce ice-dam formation and excess load; fresh snow typically ranges 50-150 kg/m³ while wet or compacted snow can exceed 200 kg/m³, raising collapse risk on weak sections. If your roof pitch is above 25-30° or your property is more than two storeys, plan to hire professionals rather than working at height yourself, and prioritise clearing valleys and eaves where water backs up and causes leaks.
Safe Methods for Removing Snow
Use a roof rake from the ground with a long, telescopic handle and work in thin layers of 10-15 cm to avoid overloading the roof or tearing shingles; pull snow towards you rather than pushing away, and clear a shallow strip along the eaves first to prevent ice dams. Avoid stepping on steep or icy roofs, and if you must access the roof use a certified harness anchored to the ridge-otherwise engage a contractor for steep pitches or multi-storey properties.
Tools and Equipment to Use
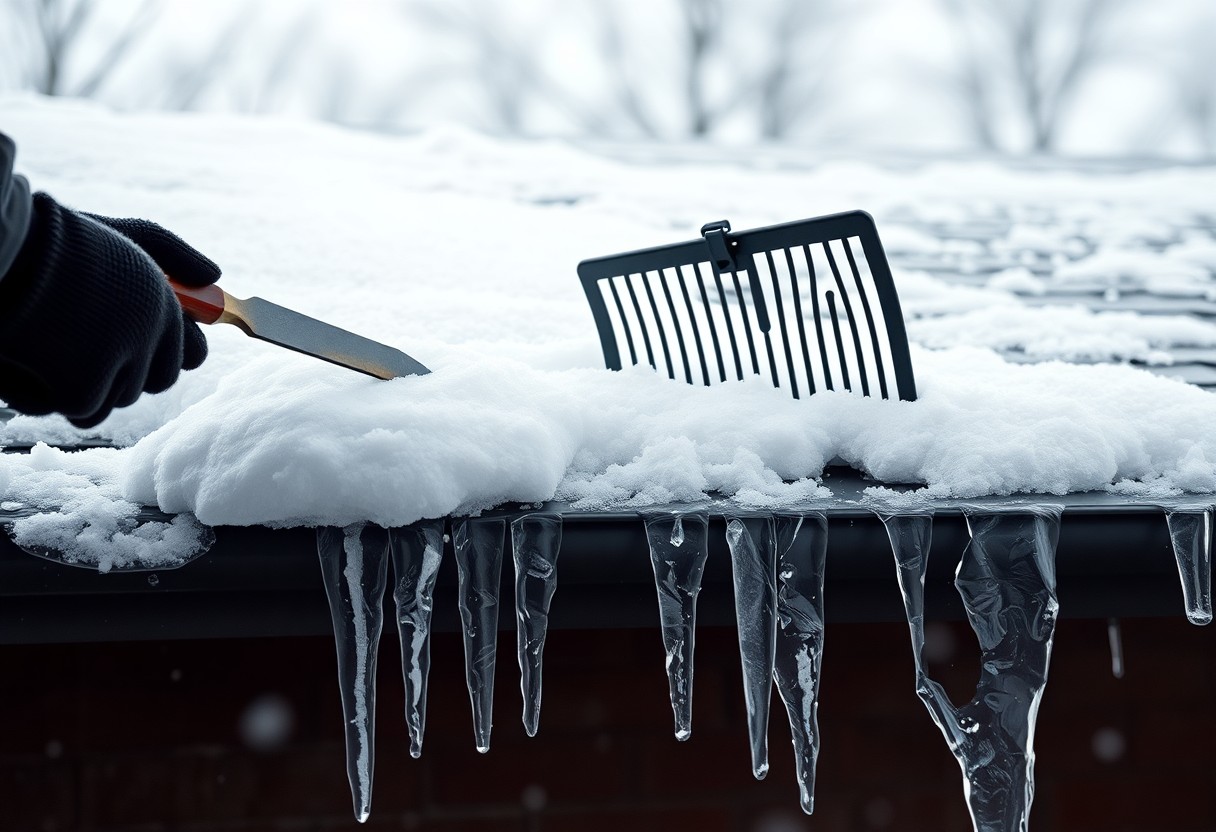
Choose a plastic-bladed roof rake with a roller head and a telescopic handle of 3-4 metres, plus a lightweight plastic shovel or roof broom for local clearing; do not use metal rakes which can damage shingles. For ice, select calcium chloride-based de-icers that remain effective to around −25°C, and consider self-regulating de-icing cables for eaves and valleys. Always wear non-slip boots, gloves and eye protection when working.
When using a roof rake, stand on stable ground at least 2-3 metres from the eaves, angle the blade so snow slides off in sections, and remove only the top layers to leave a thin insulating film that protects shingle granules. Install de-icing cables in a zigzag across problem sections and keep chemical de-icers away from plants and timber; if you notice sagging or unusual noises, stop work and call a structural assessor or roofer immediately.
Essential Roof Maintenance Tips
Inspect your roof at least twice a year and after storms, checking for missing or damaged shingles, cracked flashing and blocked gutters; trim overhanging branches, remove moss with an approved treatment, and verify attic ventilation and insulation to reduce ice-dam risk. Use binoculars for a ground inspection and note loose nails or slipped tiles; engage a roofer for any work above ladder height. Assume that you book a professional inspection every 3-5 years and after severe weather.
- Inspect shingles
- Check flashing
- Clear gutters
- Remove moss
- Trim branches
Clearing Snow and Ice
When snow exceeds about 10 cm you should clear it with a long-handled roof rake from the ground to reduce load and prevent eaves ice dams; never climb onto a slippery roof, and consider heated cables or a professional if ice dams recur. You must also keep downpipes free so meltwater can discharge, as standing water freezing at the eaves causes the most structural damage.
Checking and Repairing Gutters
Check your gutters at least twice a year and after autumn leaf fall, removing debris by hand or with a trowel; look for sagging runs, splits, loose brackets and corrosion, reseal joints with a compatible sealant, and replace sections that leak to stop water overflowing and freezing against the fascia. You should also run a hose to verify clear flow to downpipes.
When you inspect gutters, work from a stable ladder or hire a tradesperson, wearing gloves and eye protection; scoop debris into a bucket, flush with a hose, then check downpipes for blockages and rod or pressure-flush if needed. Adjust hangers to restore fall, replace lengths where corrosion or splits are beyond patching, and fit gutter guards in tree-lined areas to reduce maintenance and the risk of ice-related damage.
Preventative Maintenance Tips
Inspect your roof at least every six months and after storms, checking for loose tiles, split flashings and shingle loss; studies show prompt repair halves the risk of water ingress. Remove snow once depths exceed 100 mm to lower load and reduce ice-dam risk, and monitor your loft temperature to prevent melt/refreeze cycles. This routine prevents small issues becoming expensive repairs.
- Inspection: biannual checks and post-storm assessments.
- Snow removal: clear when depth >100 mm; use a roof rake from ground.
- Flashing: reseal around chimneys and skylights with suitable mastic.
- Gutters: clear and test flow to avoid overflow and rot.
- Insulation: ensure loft insulation meets 270 mm where applicable.
Sealing and Insulating Your Roof
You should seal gaps around pipes, chimneys and soffits with expanding foam or roof-grade mastic to stop warm air escape; aim for loft insulation of around 270 mm of mineral wool to reduce heat loss by up to 25%. Check that loft hatch and eaves are draught-proofed, and address any wet insulation immediately to avoid mould growth and timber decay.
Gutter Cleaning and Maintenance
Clean gutters at least twice a year-autumn and spring-and more often if trees overhang; blocked gutters can cause water to back up and enter the roof space. Use gloves and a stable ladder, or employ a professional if your roof is over 3 m high, since the greatest risk is falling from height.
When cleaning, remove debris by hand or with a scoop, then run a hose to check downpipe flow and spot leaks; seal joints with silicone or replace worn connectors. Watch for sagging runs where water pools-these often indicate broken straps or inadequate falls-repairing them quickly prevents fascia rot and ice formation. Consider installing fine-mesh gutter guards where leaves are persistent to reduce maintenance frequency.
Protecting Your Roof from Ice Dams
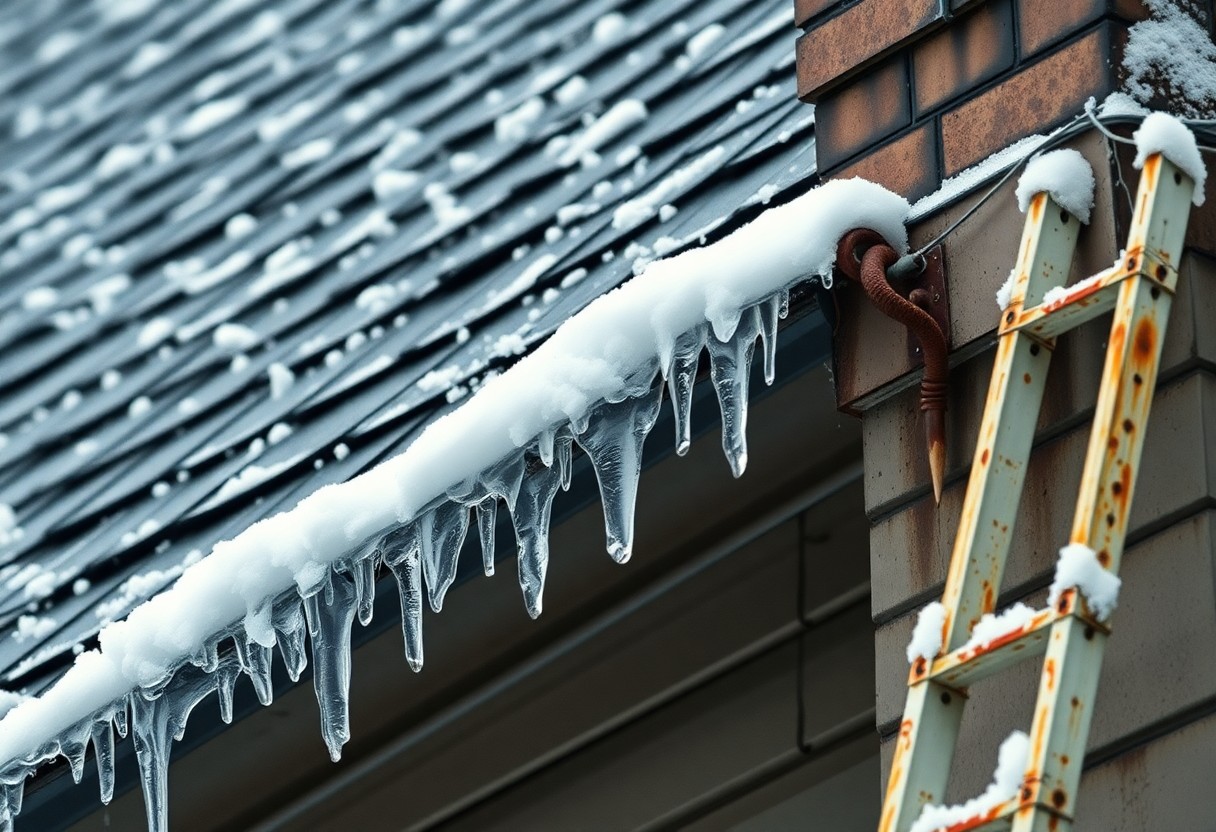
Uneven roof temperatures cause ice dams where warm attic air melts snow and water refreezes at the eaves, forcing water back under the tiles and into the loft. To prevent this you should combine good loft insulation, continuous ventilation and regular snow removal; ice dams often form when the upper roof is above 0°C while eaves remain below freezing. Left unchecked, water ingress can cause rot and structural damage that may cost thousands to repair.
Creating Proper Insulation
You should aim for at least 270mm of loft insulation (mineral wool or equivalent) and seal gaps around loft hatches, pipe penetrations and light fittings to stop warm air rising into the roof space. Add eaves baffles to preserve a 25mm ventilation channel where required and avoid compressing insulation under joists; poor airtightness and compressed insulation are common causes of ice dam formation and increased heating bills.
Installing Roof Heating Cables
Choose self‑regulating roof heating cables rated typically at 10-20 W/m, position them along eaves, in valleys and around gutters, and control them with a thermostat or snow sensor so they operate only when needed. You must fix cables with manufacturer clips and never overlap runs; incorrect installation can create a fire hazard and void warranties. Have the final electrical connection carried out by a qualified electrician (BS 7671/NICEIC).
Self‑regulating cables increase output in colder sections of the roof and reduce it when temperatures rise, making them more efficient than constant‑wattage types; for example, a 12 m eaves run at 15 W/m draws 180 W (0.18 kW). If you run that for 4 hours daily over a 60‑day spell it uses about 43.2 kWh, costing roughly £15 at ~£0.34/kWh. You should fit cables with approved clips, keep them clear of flashing, install a snow/temperature controller and ensure final connection has RCD protection and is made by a qualified electrician to comply with regulations and protect your insurance.
Identifying Signs of Roof Damage
When you inspect midwinter, focus on visible indicators: water stains on ceilings, sagging rooflines, missing or curled shingles and granule build-up in gutters. You should also watch for persistent icicles and ice dams along eaves, increased condensation in loft spaces and unexplained rises in heating bills. Photographs dated over a few weeks help you track deterioration and show whether issues expand; small splits around chimneys or vents often precede larger failures.
Warning Signs of Leaks and Structural Issues
You will spot leaks via brown stains, peeling paint or soft plaster inside; if a stain grows more than a few centimetres between inspections, act fast. Outside, check for loose flashing, rusted vent collars and sagging valleys where supporting timber may be compromised. During thaw periods, drips from ceiling joints or rising mould indicate active ingress, and any sag that causes puddles on the roof is a sign of structural distress.
How to Address Minor Problems Promptly
For minor defects, you should clear gutters and loosened outlets, reseat or temporarily secure lifted shingles with roofing cement, and apply an emergency patch or tarp over small leaks within 48 hours. Use a roof rake to remove heavy snow rather than walking on icy surfaces, and seal gaps around flashings with compatible sealant. If you’re unsure, photograph the area and get a quote before conditions worsen.
When you tackle small repairs, follow a practical order: remove debris, dry the area if possible, then apply a compatible patching product-use roofing cement for asphalt and a neoprene collar for pipe penetrations. For asphalt shingles, replacing a single unit typically needs four nails and adhesive tabs; if you notice an affected area larger than about 1 m², or the leak persists after a temporary fix, call a qualified roofer to avoid hidden timber decay or insulation damage.

Scheduling Professional Help
When you spot signs that need a pro, book as soon as possible: non-urgent repairs typically have a lead time of 7-14 days, whereas emergency call-outs should be available within 24-72 hours. Winter demand peaks in January-February, so early bookings avoid delays. If temperatures fall below 0°C, aim for a same-week inspection to prevent frozen water worsening membrane or flashing damage.
When to Call a Roofer
If you see water stains spreading, tiles missing, sagging decking, or continuous drips, call immediately; leaks left for 48-72 hours often escalate to rotten joists or insulation mould. An urgent call is also needed when you notice large ice dams exceeding 10cm or electrical issues near wet areas-these are dangerous and may require evacuation until the roofer or an electrician assesses risk.
Choosing the Right Contractor
Always verify membership of bodies such as the NFRC or TrustMark, ask for proof of public liability insurance (typically £5m), and insist on a written quote detailing materials, labour and a clear guarantee-many pitched-roof warranties run from 10-30 years. You should also check that the contractor offers a post-job inspection and Waste Carrier registration if they’re removing old materials.
Get at least three written quotes and compare unit costs per square metre; for example, replacing a 60m² pitched roof can range between £4,000-£10,000 depending on materials, so ask for a detailed breakdown. You should contact two recent references, visit a live site, and confirm the contractor will use winter-safe practices. Prioritise firms that provide a signed contract with clear start and completion dates.
Preparing for Severe Winter Weather
When forecasts predict more than 15 cm of snow or winds over 50 mph, act quickly: secure loose tiles, clear gutters, trim branches within 3 m of the eaves and check loft insulation and ventilation to prevent ice damming. If snow depth exceeds 10 cm use a snow rake rather than climbing onto the roof, and for roofs older than 20 years arrange a professional inspection-emergency repairs after collapse can cost £1,000+, so prevention is financially sensible.
Creating a Winter Roof Maintenance Checklist
Compile weekly and post-storm items: inspect for missing or cracked tiles, clear debris from gutters and valleys, check flashing around chimneys and vents, and note sagging areas. Schedule a professional check every 12 months or sooner if you have a roof steeper than 30° or higher than 6 m. Keep PPE, a sturdy ladder and a snow rake accessible, and log dates and photos of each check to support any future insurance claim.
Emergency Repairs and Resources
If you discover leaks, sagging or collapsed sections, photograph the damage, isolate hazards below and contact your insurer and a certified roofer immediately; most insurers expect notification within 14 days. Use a temporary tarpaulin only as a short-term fix and avoid walking on icy roofs; emergency tarp jobs typically cost between £150-£400 while permanent repairs vary widely.
When arranging emergency help, ask for proof of membership with a recognised body (such as the NFRC), confirmation of Public Liability insurance of at least £5 million, and an estimated response time-many reputable emergency contractors offer a 2-4 hour response in severe weather. Obtain at least two written quotes, keep all receipts, and if you need temporary boarding or tarpaulins request a written scope and signed safety measures to avoid unnecessary follow-up costs of £500-£2,500 for full repairs.
DIY Preventative Measures
Target common hazards such as heavy snow, ice dams and blocked gutters; you should clear snow once depth exceeds 10 cm (4 in) to reduce load and inspect your roof every 4-6 weeks during winter. Use a roof rake from the ground to remove loose snow, keep loft insulation at around 16-18°C to reduce condensation, and expect to save 20-30% on repair costs by acting early.
Simple Maintenance Steps
Begin with a ground-level sweep for loose tiles and sagging gutters, then use a telescopic roof rake to clear snow and ice from ridges and valleys. You should trim overhanging branches and check flashings around chimneys and vents after storms; when accessing heights, never climb a slippery roof, and inspect the loft for stains or mould as an early leak indicator.
Tools and Materials Needed
Essential items include a telescopic snow rake (3-6 m reach) with a plastic head, a sturdy extension ladder with stabiliser, fall-arrest harness and non-slip boots, heavy-duty gloves and a roof-safe broom. Keep calcium chloride ice melt for pathways (effective to −25°C) and a torch for attic checks; you should avoid metal rakes that can damage shingles.
Select a snow rake with a wide plastic blade to prevent shingle abrasion and choose a ladder that extends about 1 metre above the eaves for safe footing. Anchor harnesses only to rated points and use a stabiliser or ladder stand-off to protect gutters; avoid rock salt near planting and opt for calcium chloride if temperatures drop below −10°C. Metal blades and improper anchor points are common causes of damage and injury, so you should prioritise purpose-built, rated equipment.
Conclusion
Conclusively, you should clear gutters of debris, remove snow build-up safely, inspect and repair flashing and shingles promptly, ensure loft insulation and ventilation are adequate to prevent ice dams, and schedule a professional inspection if you spot leaks or structural issues to protect your roof and avoid costly winter damage.
Final Words
Conclusively you should routinely clear your gutters and remove snow carefully, inspect for damaged slates or tiles, seal gaps, trim overhanging branches, and schedule a professional inspection to prevent leaks and ice dams; maintain adequate loft insulation and ventilation to reduce condensation and heat loss.
FAQ
Q: How should I prepare my roof before winter arrives?
A: Conduct a thorough inspection in late autumn: check tiles or slates for cracks or displacement, examine flashings around chimneys and vents, and reseal gaps with appropriate roofing sealant. Clear gutters and downpipes of debris so meltwater drains freely. Inspect the loft for signs of poor insulation or ventilation – adding insulation and ensuring vents are unobstructed reduces heat loss that can cause ice dams.
Q: What is the safest way to remove snow from a roof?
A: Use a long-handled roof rake from ground level to pull snow down in thin layers, working horizontally across the slope to avoid overloading one area. Never climb a slippery roof unless you are a trained professional with the correct safety kit. For heavy, compacted snow or where access is difficult, hire a reputable roofer to reduce the risk of injury and accidental damage to tiles or membranes.
Q: How can I prevent and manage ice dams?
A: Reduce heat escaping into the roof space by improving loft insulation and sealing draughts around loft hatches, pipework and light fittings; ensure adequate ventilation to keep roof temperatures even. Remove accumulated snow promptly with a roof rake to lessen meltwater refreezing at the eaves. For persistent problems, install eaves heating cables installed by a qualified electrician and roofer, and consider targeted professional repairs to flashing and insulation to address underlying causes.
Q: What care do gutters and downpipes need in winter?
A: Clean gutters and downpipes before freezing weather to prevent blockages from leaves and debris that trap water and form ice. Check brackets and fixings so gutters remain secure under the weight of ice and snow. Fit gutter guards to reduce future blockages and ensure downpipes lead to clear drainage channels; where ice build-up is a risk, consider installing rainwater heating cables to keep water flowing.
Q: When should I call a professional roofer during winter?
A: Contact a professional if you spot persistent leaks, sagging rooflines, missing or broken tiles, damaged flashings, or significant snow loads that you cannot safely remove. Use contractors who are insured, accredited and offer emergency call-out services for storm damage. For temporary fixes, a tradesperson can apply suitable coverings or tape to limit water ingress until full repairs are possible in safer conditions.