Energy savings start in your loft when you prioritise insulation, draught-proofing and balanced ventilation to cut heat loss and reduce bills; ensure you address insulation gaps, condensation and mould risks and any overloaded or unsafe wiring that can create a fire hazard. You’ll benefit from lower energy bills, better comfort and a smaller carbon footprint,… How to Make Your Loft Energy Efficient
Energy savings start in your loft when you prioritise insulation, draught-proofing and balanced ventilation to cut heat loss and reduce bills; ensure you address insulation gaps, condensation and mould risks and any overloaded or unsafe wiring that can create a fire hazard. You’ll benefit from lower energy bills, better comfort and a smaller carbon footprint, and you should follow building regulations or consult a qualified installer for safe, effective improvements.
Understanding Energy Efficiency
Key Factors Affecting Loft Energy Use
Insulation thickness, airtightness and ventilation largely determine how much heat your loft loses; an uninsulated roof can account for around 25% of a typical home’s heat loss. Consider glazing, rooflights and thermal bridging at party walls as well. Below are the main keywords to check when assessing your loft:
- Insulation
- Airtightness
- Ventilation
- Thermal bridges
- Rooflights
- Heating controls
- Loft insulation
- R-value
- Thermal bridging
- Breathable materials
- Vapour control
- Inspect insulation depth and condition every 6-12 months.
- Seal gaps for draught-proofing around pipes, loft hatch and wiring.
- Clear eaves and vents to maintain ventilation and prevent damp.
- Replace wet or compressed material within weeks to avoid heat loss.
Perceiving how these interact lets you prioritise measures-install 270mm of insulation where appropriate, seal obvious air leaks, and maintain balanced ventilation to avoid condensation and mould.
Benefits of Energy Efficiency in Lofts
Upgrading your loft delivers tangible gains: installing around 270mm of insulation typically cuts roof heat loss by up to 25%, which can reduce your heating energy use by roughly 10-20% depending on dwelling type, while also giving steadier temperatures and fewer cold spots.
For example, combining loft insulation with draught‑proofing and an insulated hatch on a three‑bed semi often yields annual savings of about £100-£250; installers commonly observe a payback period of roughly 3-6 years. You should also see improved EPC bands and greater long‑term comfort, especially when you pair loft measures with good heating controls.
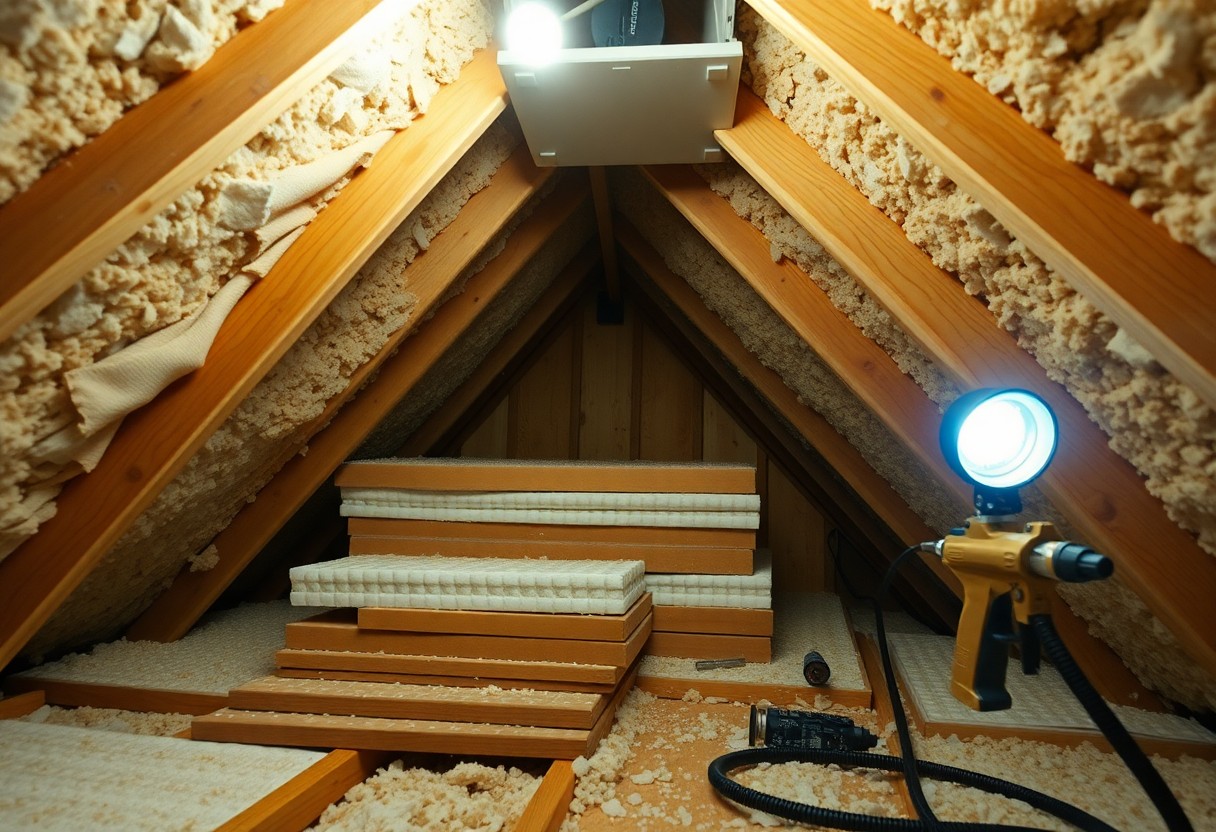
Insulation Techniques
You should prioritise continuous thermal envelopes and minimise thermal bridging by overlapping layers and sealing gaps around eaves, pipes and loft hatches; a typical target is 270 mm of loft insulation for fibrous products. Use a combination of airtightness measures and a proper vapour control layer to avoid condensation. For complex roofs or near chimneys, opt for professional installation to meet fire safety clearances and building regulations.
Types of Insulation Materials
You can choose between mineral wool, fibreglass, PIR boards, spray polyurethane foam and natural options like sheep’s wool, each offering different thickness-to-performance trade-offs and costs. Some materials perform better in narrow rafter spaces while others also improve airtightness; installation complexity and moisture behaviour vary. Recognizing each material’s trade‑offs helps you choose the best solution for your loft.
| Mineral wool | Affordable, fire‑resistant, easy to fit between joists |
| Fibreglass | Low cost, good performance, needs careful sealing |
| PIR boards | High thermal resistance per mm, ideal for limited depths |
| Spray foam | Seals gaps and adds structure, higher cost, ventilation impacts |
| Sheep’s wool | Natural and breathable, pricier but sustainable |
Insulating Walls and Ceilings
You should treat party and external walls differently: fill cavity walls with blown insulation where present, or add internal boards of 50-100 mm for solid walls, ensuring you maintain services and skirting clearance. On ceilings between rooms and the loft, lay insulation across joists to at least 270 mm, keeping eaves ventilation clear and access hatches insulated. Watch for condensation risks around cold bridges and pipework so you avoid mould.
When you add internal insulation, you will reduce room space and must rerun fixings for sockets and radiators; using thin PIR boards can limit lost area while achieving low U‑values. Ensure mechanical ventilation or trickle vents remain adequate if you seal airtight layers, and always maintain a fire separation around chimneys and loft ladders – failing to do so can create serious fire and moisture hazards. For ceilings, stagger joints and avoid compressing insulation, because compressed fibre loses about 20-30% of its rated performance; in practice, combining 270 mm of fibrous fill with airtight sealing typically yields the best balance of cost and thermal gain.
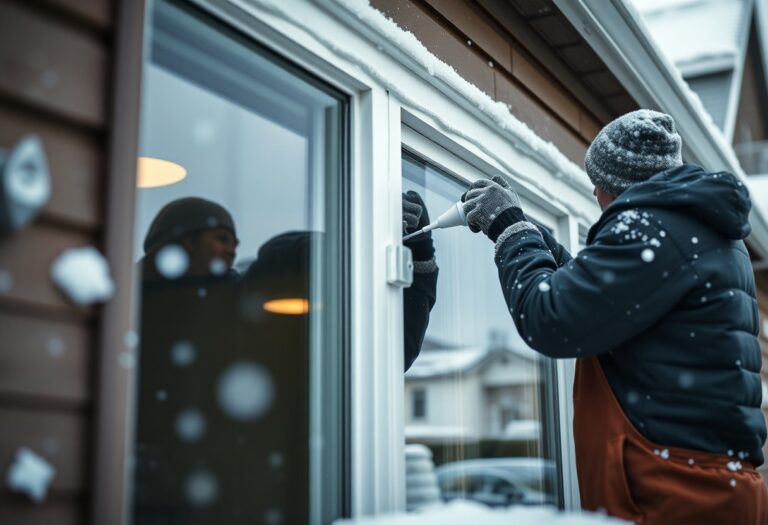
Windows and Doors
Windows and doors often account for up to 25% of heat loss in older homes, so you should treat them as priority targets: replace single glazing with double or triple glazing where feasible, add secondary glazing to listed or budget-limited rooms, and fit insulated, draught‑proof external doors. You can also reduce loss quickly by improving airtightness at frames and thresholds; for example, upgrading frames and seals typically cuts window-related heat loss by a large margin and improves comfort immediately.
Choosing Energy-Efficient Windows
You should target windows with low U‑values and modern features: aim for U‑values below ~1.4 W/m²K where possible, seek argon‑filled units with low‑E coatings and warm‑edge spacers, and prefer timber or uPVC frames with thermal breaks over uninsulated aluminium. Replacing single glazing with good double glazing typically halves the window’s heat loss, while triple glazing yields further gains in colder locations or for north‑facing rooms.
Sealing Leaks and Gaps
Start by finding draughts around frames, letterboxes, and the loft hatch using a candle, thermal camera or smoke; draughts increase bills and raise condensation and mould risk. You can use silicone caulk for small gaps, brush seals for sash windows, compressible foam tape for uneven frames and expanding foam for larger voids. Draught‑proofing windows and doors can cut heat loss notably – often around 10% of heating demand for an average semi.
When sealing, work systematically: clean and dry surfaces first, measure gap widths and choose materials accordingly (rope or foam tape for 2-10mm, brush seals for moving parts, PU foam for >10-20mm). Keep trickle vents or install controlled ventilation if you tighten the building envelope, and never fully seal rooms with gas or solid‑fuel appliances without ensuring safe flue ventilation to avoid carbon monoxide risks.
Heating and Cooling Solutions
You should focus on reducing both winter heat loss and summer heat gain in the loft: around a third (≈33%) of household heat can be lost through the roof, while poor ventilation can push loft temperatures high enough to transfer heat into living spaces. Combine improved insulation and airtightness with smart controls and targeted ventilation so you reduce heating bills and prevent overheating without overhauling the entire heating system.
Energy-Efficient Heating Options
You can save substantially by pairing upgraded loft insulation (min. 270 mm mineral wool or equivalent) with zoned heating and a smart thermostat; an air-source heat pump with a COP of 3-4 typically delivers three to four times the heat energy per unit of electricity compared with direct electric heating. Also consider insulating and draught-proofing loft hatches and pipes to avoid thermal bridges that waste energy.
Effective Cooling Strategies
You should prioritise passive measures first: continuous ridge and soffit vents, reflective roof membranes or light-coloured tiles, and night-time purge ventilation can cut heat transfer into rooms and reduce reliance on fans or AC. A well-ventilated loft with solar-powered attic fans and properly fitted breathable membranes often prevents heat build-up that would otherwise drive up cooling demands.
You can further optimise cooling by creating cross-ventilation paths and installing a solar attic fan with thermostat control to activate at peak temperatures; trials show reflective membranes and roof coatings can lower peak loft temperatures by up to 10-15°C, while effective night purge can reduce internal temperatures by 2-4°C. For south-facing lofts, add external shading or a planted roof to cut solar gain and protect insulation performance.
Utilising Renewable Energy
Solar Panel Installation
Position panels south-facing at a 30-40° tilt to maximise yield; each kW of PV typically delivers about 700-1,000 kWh per year in the UK, so a 4 kW array can supply roughly 2,800-4,000 kWh annually. You should commission a roof survey to confirm load-bearing capacity and roof integrity, opt for microinverters or optimisers if shading is present, and factor in a 6-12 year payback window depending on energy use and export rates under the Smart Export Guarantee.
Wind Energy Considerations
Small wind turbines for homes usually range from 1-6 kW and need average wind speeds of around 5-6 m/s to be viable; you must check structural mounting on your loft or ridge, potential noise and vibration impacts for neighbours, and local planning requirements. You can pair turbines with a 4-10 kWh battery to smooth supply, but expect variable output and higher maintenance than PV.
Carry out a site-specific wind assessment using an anemometer for at least 12 months to avoid overestimating yield; sites with consistent winds above 5 m/s may see much shorter payback. Also ensure your mounting frame meets engineering standards, budget for annual inspections, and compare yields against a similar case study-domestic turbines in exposed coastal locations often outperform sheltered urban roofs by two- to threefold.
Maintenance Tips
Keep your loft energy performance by ensuring insulation reaches around 270mm, sealing gaps for draught-proofing, and maintaining clear ventilation to prevent condensation and mould; inspect for water ingress and pest damage annually, and use an infrared thermometer to spot cold bridges-LED replacements alone can cut lighting use by 75%. Thou should log checks, repairs and measurements to track improvements.
Routine Checks for Efficiency
Carry out routine checks every 6-12 months: measure insulation depth (target 270mm), test seals around your loft hatch and service pipe penetrations for draught-proofing, and scan for cold spots with an infrared thermometer; if you spot mould or persistent damp, increase mechanical or passive ventilation and remove affected insulation promptly to prevent performance loss.
Upgrading Appliances and Systems
When upgrading, prioritise fabric measures then high-efficiency kit: fit a modern A-rated condensing boiler or an air-source heat pump, install a smart thermostat to cut heating energy by about 10-12%, and switch to LED lighting to reduce consumption by roughly 75%.
Air-source heat pumps commonly deliver a COP of 3-4, so size systems only after boosting loft insulation to avoid overspecification; check your EPC, seek available grants such as the UK Boiler Upgrade Scheme, and compare payback periods-typical heat-pump paybacks vary widely but often fall in the 7-15 year range depending on insulation and energy prices.
Conclusion
Considering all points, you can make your loft energy efficient by prioritising high-quality insulation, sealing draughts around hatches and vents, insulating pipes and hot-water tanks, and ensuring controlled ventilation to prevent condensation; fit LED lighting and smart heating controls, improve loft hatch insulation, and commission an energy assessment so you can target measures that reduce heat loss and lower your bills.
FAQ
Q: What are the most effective insulation options for a loft?
A: For an unconverted loft the most common and cost-effective choice is loose-laid mineral wool or glass-fibre rolls at a depth of around 270mm to achieve current thermal performance guidance. Alternatives include loose-fill cellulose, blown mineral fibres for irregular spaces, and rigid PIR or phenolic boards where space is limited. For a converted loft or warm roof, insulation is typically installed in the rafters using rigid boards or insulated plasterboard; the required thickness varies by product but commonly falls in the 100-150mm range to meet Part L targets. Choose materials with appropriate fire and moisture performance and check manufacturers’ U-values when calculating compliance.
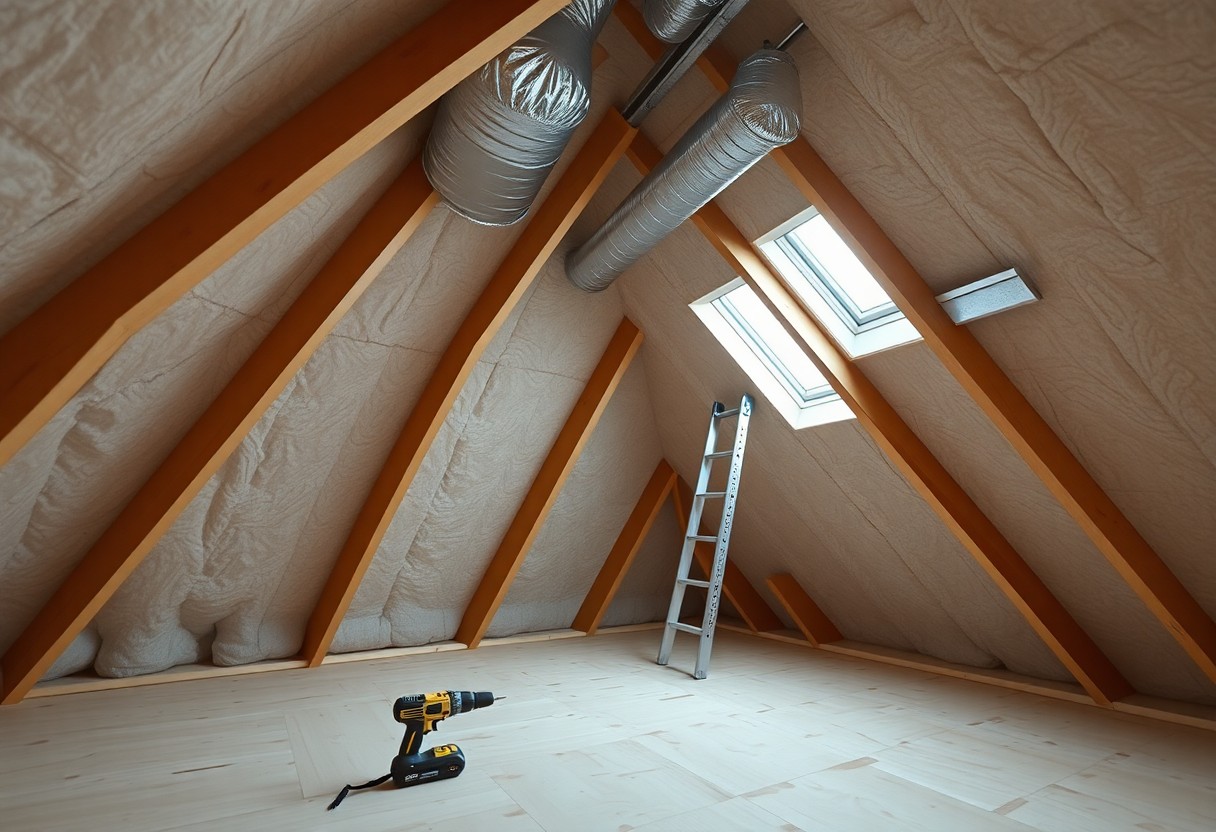
Q: How do I prevent condensation and maintain adequate ventilation in the loft?
A: Maintain ventilation routes at the eaves and ridge or use breathable membranes under the roof covering so any moisture can escape. In an unconverted loft keep the loft void ventilated above the insulation; do not block soffit vents. For insulated warm roofs or converted lofts use a vapour control layer on the warm side and ensure detailing prevents cold bridges. Ventilate by means of continuous or point vents, and install extractor fans with humidity controls in bathrooms to reduce moisture migration into the roof space.
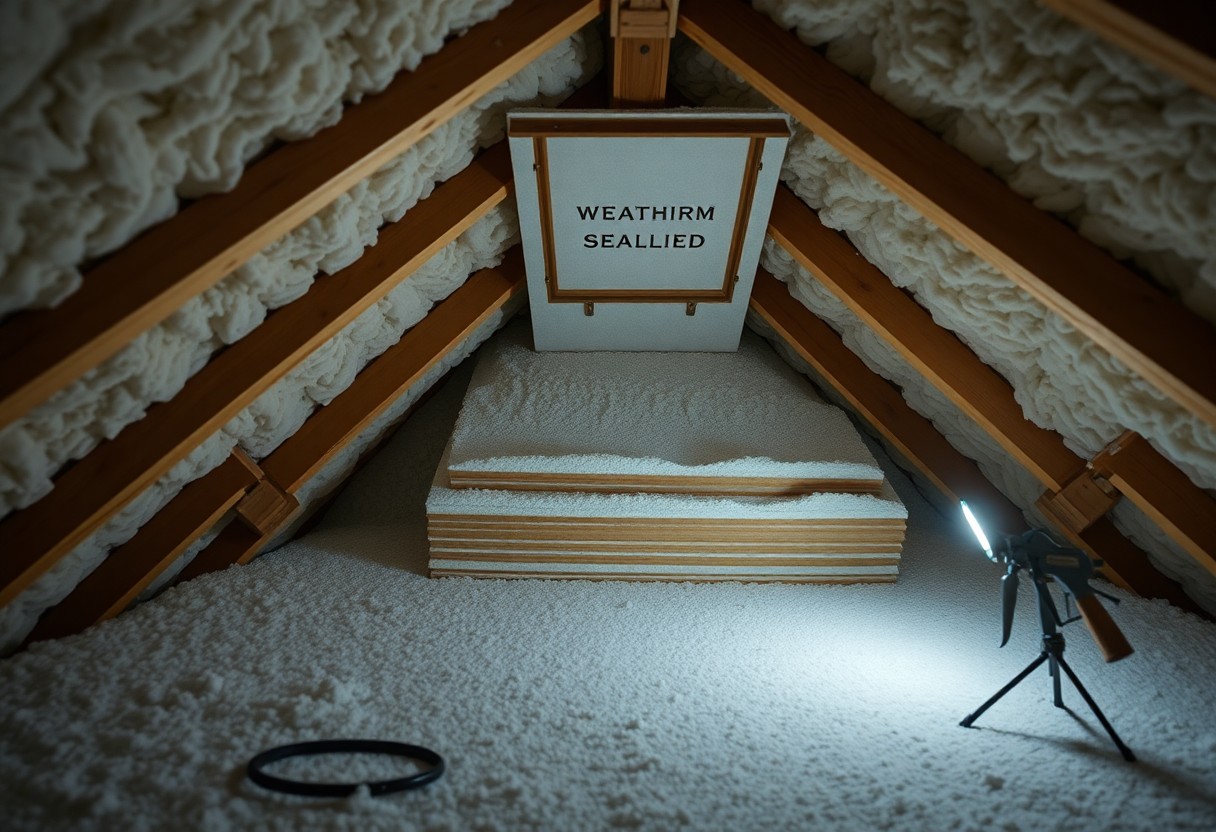
Q: How should I draught-proof the loft hatch and services without causing issues?
A: Fit a well-sealed, insulated loft hatch or an insulated hatch cover with a compressible draught seal around the perimeter so the hatch achieves a similar thermal resistance to the surrounding insulation. Insulate and lag hot-water tanks and exposed pipework in the loft, and seal gaps around wiring, ducts and service penetrations with appropriate seals or expanding foam. Ensure any combustion appliances in the loft or drawing air from the loft retain required ventilation and clearance for safe operation when draught-proofing.
Q: What must I consider about insulation and regulations when converting the loft into a living space?
A: A loft conversion will usually require compliance with Building Regulations, including Part L (conservation of fuel and power), Part B (fire safety) and Part C (structural safety). Insulate the roof and walls to the published U-values; typical approaches are warm roofs with rigid insulation above rafters or insulated plasterboard internally. Pay attention to thermal bridging at junctions (eaves, dormers, party walls), adequate ventilation, fire separation (fire doors, protected escape routes) and sound insulation. Engage a suitably qualified designer or building control officer early to confirm detail and calculations.
Q: What low-cost measures and controls will make my loft and home more energy efficient quickly?
A: Top up loft insulation to the recommended depth (around 270mm if not already achieved), fit an insulated and sealed loft hatch, lag hot-water tanks and pipes in the loft, and draught-proof windows, doors and service gaps. Install thermostatic radiator valves and a programmable or smart thermostat to reduce heating hours and temperatures when rooms are unoccupied. Replace lighting with LEDs and consider roof-mounted solar PV panels to offset electricity use, subject to roof condition and orientation. These measures typically deliver noticeable savings with modest capital outlay.