
This concise guide tells you how to prepare the ground for patio installation so you can assess your site, locate any buried services, mark levels, ensure effective drainage, and create a properly compacted, stable base for your patio to avoid future movement.
Understanding the Site
Evaluating the Terrain
You should map existing levels with a spirit level or laser; a 5‑metre patio that varies by more than 50-60mm needs regrading. Check soil type – clay holds water and often requires a deeper sub‑base (typically 150-200mm of MOT Type 1), while sandy soil drains faster and can get away with 100-150mm. Also inspect for tree roots within 5m, buried services and previous landscaping that will affect excavation and long‑term stability.
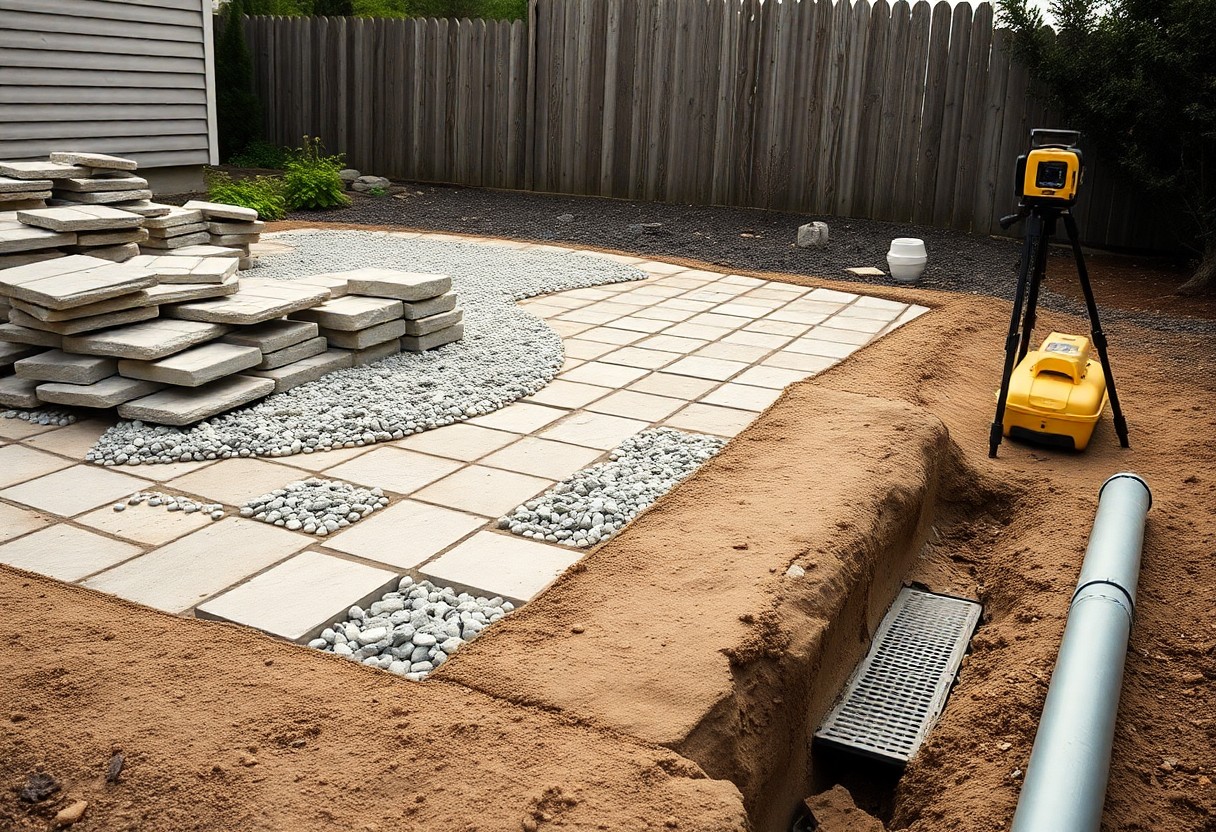
Assessing Drainage Needs
Plan a fall of around 1:80-1:100 (about 10-12.5mm per metre) directing water away from buildings into garden outlets, a drain or soakaway; for example a 5m run should fall roughly 50-62mm. If water is likely to pond, include linear drains or permeable paving and position outlets at the lowest point to avoid ponding and surface slipperiness.
Do a simple percolation check by digging a 300mm hole, filling with water and timing the drain‑away; if it still stands after 24 hours you’ll need a soakaway or sub‑surface drainage. Consider a 600-900mm deep soakaway chamber filled with 20-40mm angular stone and wrapped in geotextile, or install discreet channel drains at thresholds; these measures prevent standing water, frost heave and algae‑slick surfaces.
Tools and Materials Required
For a solid installation you’ll need a mix of hand and powered tools plus specific base materials; for example, a 3×4 metre patio typically requires a 50-70 kg plate compactor, string line and spirit level, plus roughly 2-3 tonnes of crushed stone. You should also have eye protection and gloves at all times because cutting pavers and compacting aggregate present hazards.
Essential Tools for Preparation
You’ll use a spade, mattock and wheelbarrow for excavation, a tape measure, string line and pegs for layout, and a spirit level or laser level for falls; a plate compactor (or hand tamper for small areas), rubber mallet and block splitter or angle grinder with diamond blade are needed for finishing. Always wear eye protection, gloves and a dust mask when cutting or compacting.
Recommended Materials for Patio Base
Use a well-graded crushed stone such as Type 1 MOT or crushed concrete for the sub-base, typically 100-150 mm deep, topped with 40-50 mm of sharp sand or grit sand as the bedding layer; include a geotextile membrane on soft ground and provide adequate drainage by grading the base at 1:60 to 1:80 fall.
Type 1 is generally 0-40 mm aggregate with fines for interlock; compact it in layers of 50-75 mm until firm. As a rule of thumb use ~1.6 tonnes per cubic metre, so 100 mm over 10 m² equals ~1.6 tonnes and 150 mm over 12 m² equals ~2.9 tonnes. Check compaction with a straight edge and make extra allowance for settlement on clay soils.
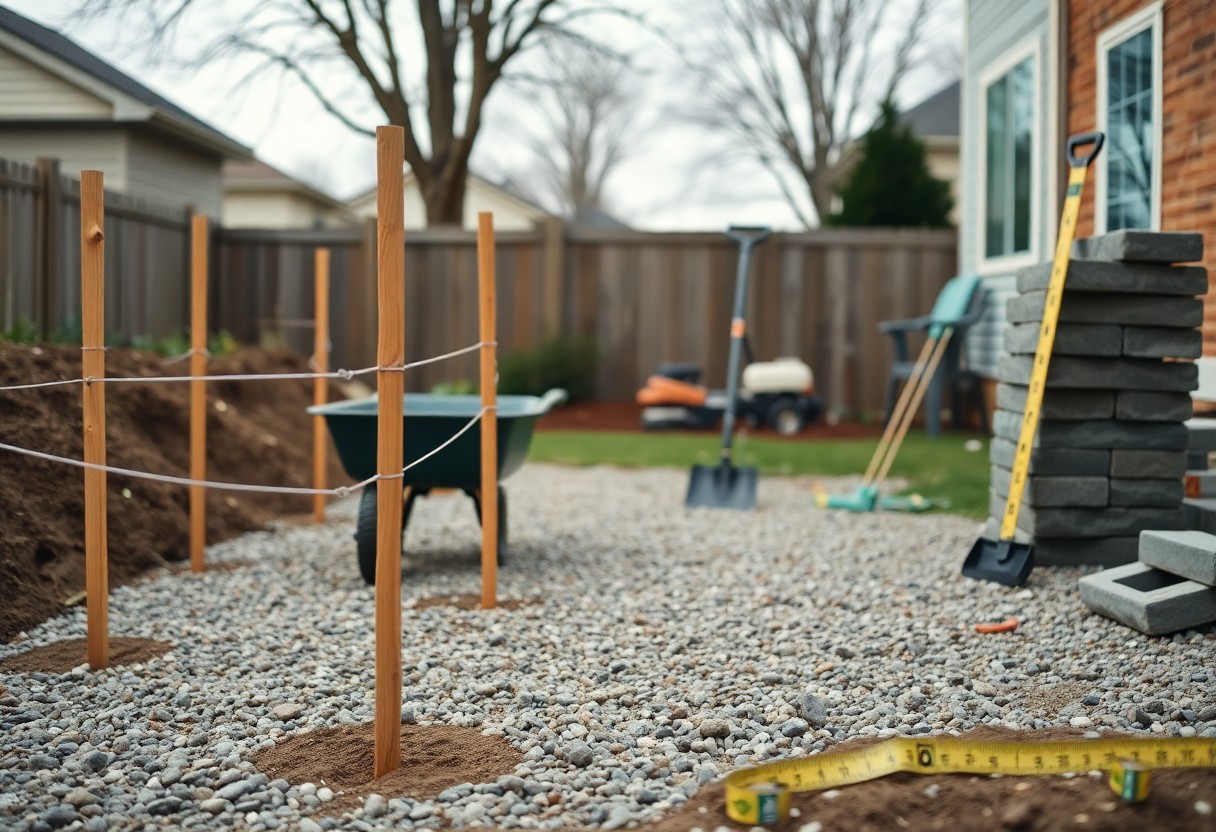
Preparation Steps
Work through the site methodically: clear vegetation and topsoil, locate and mark services, set datum pegs and stringlines for the finished level, excavate to the calculated depth, install a geotextile if needed, lay and compact your base in layers, then check fall and final level before bedding. For example, excavating to 225mm depth suits 50mm slabs on 25mm sand over a 150mm compacted base; adjust if your pavers or loads differ.
Clearing the Area
Remove turf and topsoil to at least 150mm beyond the patio footprint and down to the planned excavation level, using a spade and wheelbarrow to cart spoil away. Use a Cable Avoidance Tool (CAT) to scan for buried services and mark them clearly with spray paint; if you hit a service, stop work and contact the utility. Cut back tree roots over 50mm with care and dispose of organic material to prevent future settlement.
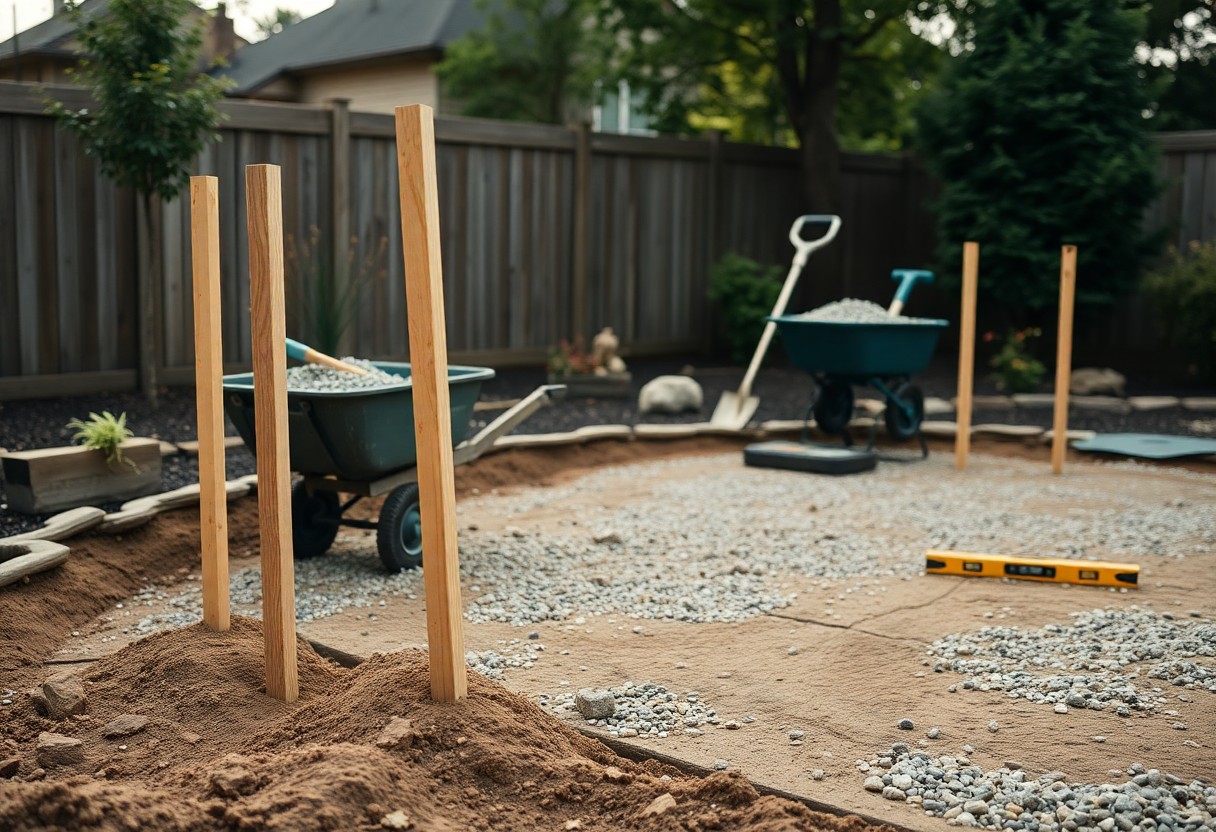
Leveling the Ground
Establish a datum at the finished paving height with pegs and string, then set a fall of roughly 1:60 (≈17mm per metre) away from buildings for drainage; check across several lines with a spirit level or laser. Compact the subgrade with a plate compactor until firm, and use a 2m straightedge to detect hollows – any dips beyond 5mm should be corrected before laying the base.
Calculate excavation by summing finishes: for example, 50mm paver + 25mm sand bedding + 150mm compacted Type 1 base = 225mm excavation. Fix stringlines at the finished level around the perimeter, then mark intermediate reduction points to guide your dig. After excavation, rake and bench the subsoil, hand-tamp shallow spots, then run the plate compactor in overlapping passes; consistent compaction and correct fall are what prevent long-term settlement and ponding.
Adding Base Materials
Use Type 1 MOT hardcore or crushed aggregate for the sub-base, laid in 50mm to 75mm lifts and compacted with a plate compactor between layers until you reach a compacted depth of about 150mm for a domestic patio. Install a permeable geotextile over soft soils to prevent migration, and ensure edge restraints are in place so the base cannot spread when compacted.
Spread the base evenly, compacting each lift until it no longer consolidates under the plate; for example, three 50mm lifts compact to ~150mm. If the patio will take occasional vehicle loads, increase the compacted depth to 200-250mm and consider adding 5-7% cement to stabilise the mix. Avoid adding excess water during installation – the material should be damp, not saturated – and finish by checking levels and falls before laying the bedding layer.
Factors to Consider
Assess site slope, surface water paths, access and intended load, and test existing ground; ensure drainage, soil type and sub‑base depth are addressed. You should allow at least 100mm compacted Type 1 for pedestrian patios and 150mm for vehicular areas, and factor in local frost depth and services. Thou prioritise durable sub‑base and surface falls to prevent long‑term settlement.
- Drainage: falls, channels, soakaways
- Soil type: clay, sand, silt, peat
- Sub‑base: depth, material, compaction
- Frost depth and freeze-thaw cycles
- Services: drains, cables, access
- Usage: pedestrian vs vehicular loading
Local Climate Impact
Wet western areas can receive 600-2000mm rainfall annually; in those locations you must size drainage and provide a fall of about 1:80-1:100 (1-1.25%) away from buildings. Freeze-thaw in upland or exposed sites increases risk of heave where frost penetrates beyond 150-300mm, so plan deeper sub‑base or insulation. You should design soakaways and gulleys to handle short, intense storms common in summer.
Soil Type and Stability
Clay, silt, sand, gravel and peat behave very differently: expansive clay can heave on wetting, while peat is highly compressible and unsuitable as a support layer. You can detect poor ground with a hand auger or trial pit and estimate bearing capacity; if subgrade CBR is below 5% consider removal or stabilisation measures.
If you encounter soft or organic layers, excavate to sound material or remove a minimum of 300mm of peat and replace with compacted Type 1 in 75-150mm lifts to achieve uniform bearing. You may stabilise high‑plasticity clays with lime or cement-typical stabilisation treats a 150-250mm zone and can raise CBR into the 5-10% design band. Geotextile separation, geogrid and piled edge restraints are practical solutions where deep removal is impractical.
Tips for Successful Installation
Excavate to allow for a 100-150mm compacted sub-base plus a 40-50mm bedding layer; compact in 50-75mm lifts with a plate compactor to achieve around 95% density, and set a fall of about 10mm per metre away from buildings. Use a geotextile membrane over soft subsoil to prevent migration, and always fix solid edge restraints. Recognizing that correct drainage and compaction are what prevent long‑term settlement and frost damage.
- Use MOT Type 1 crushed stone for the sub-base.
- Compact each layer with a plate compactor to ~95% density.
- Provide a fall of 10mm per metre from structures.
- Install firm edge restraints fixed in concrete.
- Lay a geotextile on soft ground before stone.
Best Practices for Ground Preparation
You should excavate to about 150-200mm below finished level for a domestic patio, remove topsoil and organic matter, then place a geotextile membrane. Add 100-150mm of MOT Type 1 in 50-75mm lifts and compact each layer; finish with a 40-50mm sharp sand bedding. Check levels with a string line every metre and maintain a fall of ~10mm per metre; increase sub-base to 200mm where you expect regular vehicular load.
Common Mistakes to Avoid
Don’t lay paving directly on topsoil or rely on a skim of sand-insufficient sub-base (<75mm) and poor compaction cause heave and sinking. Avoid skipping edge restraints or failing to provide adequate fall for drainage, since standing water accelerates failure. Also avoid using contaminated recycled material that can wash out.
You often see inadequate compaction and retained organic topsoil as the primary culprits: if you leave the original top 150mm with roots and compost, it will decompose and create voids, so strip to competent subgrade. Similarly, compact the sub-base in specified lifts-compact 50-75mm layers to ~95% rather than attempting one‑pass compaction. Finally, concrete‑fixed edge restraints or galvanised edging prevent lateral spread under load, eliminating a common failure mode.
To wrap up
The preparation of your ground determines a long-lasting patio: you should clear vegetation and topsoil, mark and excavate to required depth, compact a suitable sub-base, lay a bedding layer, install firm edging and falls to ensure drainage away from the property, and trace underground services before paving; thorough, precise work by you prevents movement, pooling and future repairs.
FAQ
Q: How should I assess the ground before starting patio installation?
A: Inspect soil type (clay, sand, silt or loam), slope, existing vegetation and proximity of trees to identify root zones. Check for standing water or previous drainage issues and locate underground services using the national utility enquiry service before digging. Measure and mark the area with pegs and string, note boundary lines and any levels relative to door thresholds, and calculate material quantities from the measured area. If the site is on a steep slope or has poor subsoil, plan for additional groundworks or professional advice.
Q: What depth and fall should I excavate for a durable patio?
A: Aim to excavate to allow for a compacted sub-base plus a bedding layer and the paving thickness. Typical guidance: for a domestic patio on stable ground excavate 140-190 mm (approx. 100-150 mm crushed stone sub-base + 40 mm bedding sand) beneath paving slabs; for block paving use about 150-200 mm total (100-150 mm sub-base + 50 mm bedding sand). Increase sub-base to 150-225 mm on soft or frost-prone soils and deeper where occasional vehicular loads are expected. Provide a fall away from buildings of around 1:80 to 1:60 (≈12.5-16.7 mm per metre) to ensure surface drainage, setting levels with a spirit or laser level as you progress.
Q: What tools and materials will I need to prepare the ground correctly?
A: Materials: geotextile membrane for separation, MOT Type 1 or crushed hardcore for the sub-base, sharp sand or grit sand for bedding, paving slabs or blocks, edge restraints/kerbs and concrete for haunching, jointing sand or polymeric jointing compound, and drainage components if required. Tools: spade, shovel, wheelbarrow, heavy-duty rake, edging iron, straight edge and spirit or laser level, tape measure, plate compactor, vibrating tamp, brick hammer or angle grinder for cutting, rubber mallet, gloves and eye protection. Use a wheelbarrow and skip for waste removal and consider hire of a small excavator for large areas.
Q: How do I construct and compact the sub-base to prevent settlement?
A: After excavation lay a geotextile if drainage or poor subsoil is present. Place crushed stone in layers no thicker than 75-100 mm and compact each layer thoroughly with a plate compactor. Check and correct levels frequently using a straight edge and level, and form the required fall. Compact until the sub-base is dense and shows no visible movement under the compactor. Install a firm edge restraint set in concrete to retain the surfacing. For block paving screed a 50 mm bedding layer of sharp sand over the compacted sub-base; for mortar-laid slabs use an appropriate mortar bed (typically 25-40 mm) and ensure full bearing of each unit.
Q: How do I manage drainage and finish the patio to avoid long-term problems?
A: Ensure the finished surface directs water away from buildings and towards an appropriate drainage point using the designed fall. Where surface water cannot soak away, install linear drains, soakaways or connect to existing drainage in accordance with local regulations. Consider permeable paving with a porous sub-base where suitable. After laying, sweep jointing sand into joints (or use polymeric jointing compound for blocks), compact the surface with a plate compactor fitted with a protection mat, and clean off residues. Leave appropriate movement joints at large runs and between the patio and rigid structures, and seal only if the selected material and local guidance recommend it.